

- News
- Reviews
- Bikes
- Accessories
- Accessories - misc
- Computer mounts
- Bags
- Bar ends
- Bike bags & cases
- Bottle cages
- Bottles
- Cameras
- Car racks
- Child seats
- Computers
- Glasses
- GPS units
- Helmets
- Lights - front
- Lights - rear
- Lights - sets
- Locks
- Mirrors
- Mudguards
- Racks
- Pumps & CO2 inflators
- Puncture kits
- Reflectives
- Smart watches
- Stands and racks
- Trailers
- Clothing
- Components
- Bar tape & grips
- Bottom brackets
- Brake & gear cables
- Brake & STI levers
- Brake pads & spares
- Brakes
- Cassettes & freewheels
- Chains
- Chainsets & chainrings
- Derailleurs - front
- Derailleurs - rear
- Forks
- Gear levers & shifters
- Groupsets
- Handlebars & extensions
- Headsets
- Hubs
- Inner tubes
- Pedals
- Quick releases & skewers
- Saddles
- Seatposts
- Stems
- Wheels
- Tyres
- Health, fitness and nutrition
- Tools and workshop
- Miscellaneous
- Cross country mountain bikes
- Tubeless valves
- Buyers Guides
- Features
- Forum
- Recommends
- Podcast
 How to replace a bike chain Feb 2025
How to replace a bike chain — simple steps to a smooth transmission
Chains wear out over time, and if you're a strong rider or frequently tackling dirty miles, it could wear out faster than you think. When a chain wears, it stretches, and its pitch - the distance between the rollers - becomes elongated. This accelerates wear on the sprockets and chainrings, which are costly components of your drivetrain. To save money and keep your transmission running smoothly, it's a good idea to replace your chain before significant wear sets in. Here's how to do it.


Our guide below shows you what we believe is the best method to replace a chain. We've included a list of the tools and materials that you will need to complete the job. If there are others that you prefer then feel free to let everybody know in the comments.
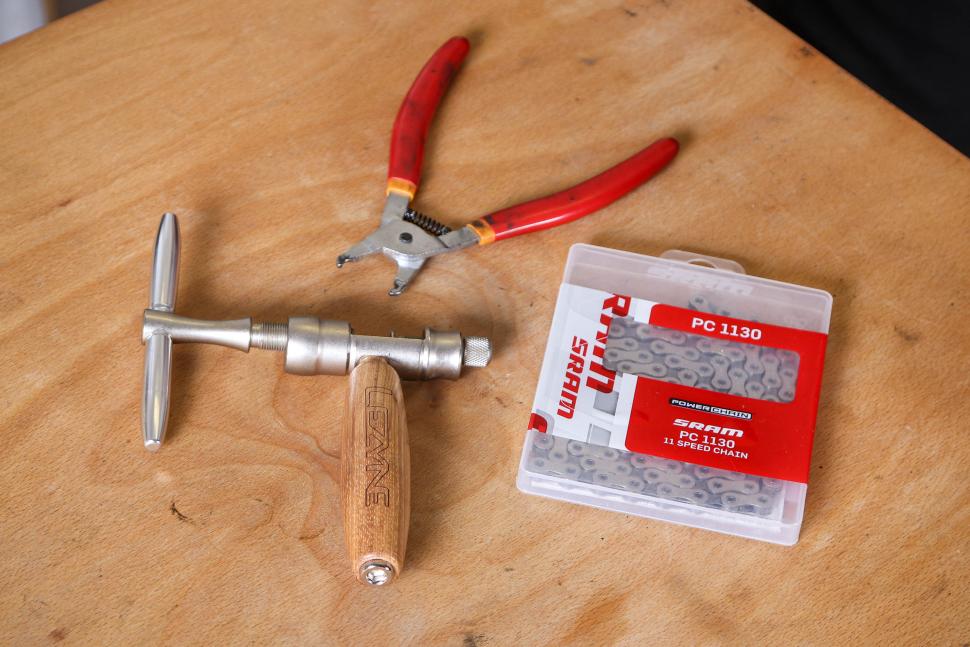
What tools and materials do you need to replace a bike chain?
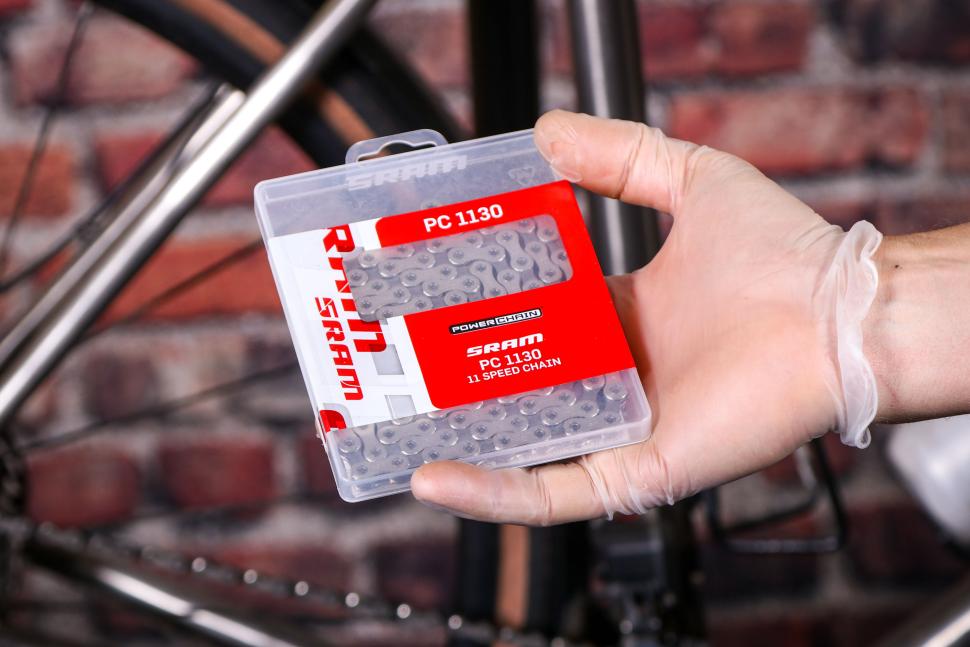
- New bike chain
- Chain link-splitter tool
- Chain wear indicator tool
- Quick link (if applicable)
- Pliers
- Cleaning supplies
- Gloves
Step 1: Check if your chain needs replacing
> Must-have tools for your first bike tool kit
Chains have specific wear limits depending on their speed. For chains that are made for an 11, 12 or 13-speed cassette, replace the chain when elongation reaches 0.5%. If it stretches to 0.75% or more, you'll likely need a new cassette as well.
For some 10-speed chains, replacement is typically needed at 0.75% elongation. If the stretch reaches 1%, the cassette will likely need replacing too.
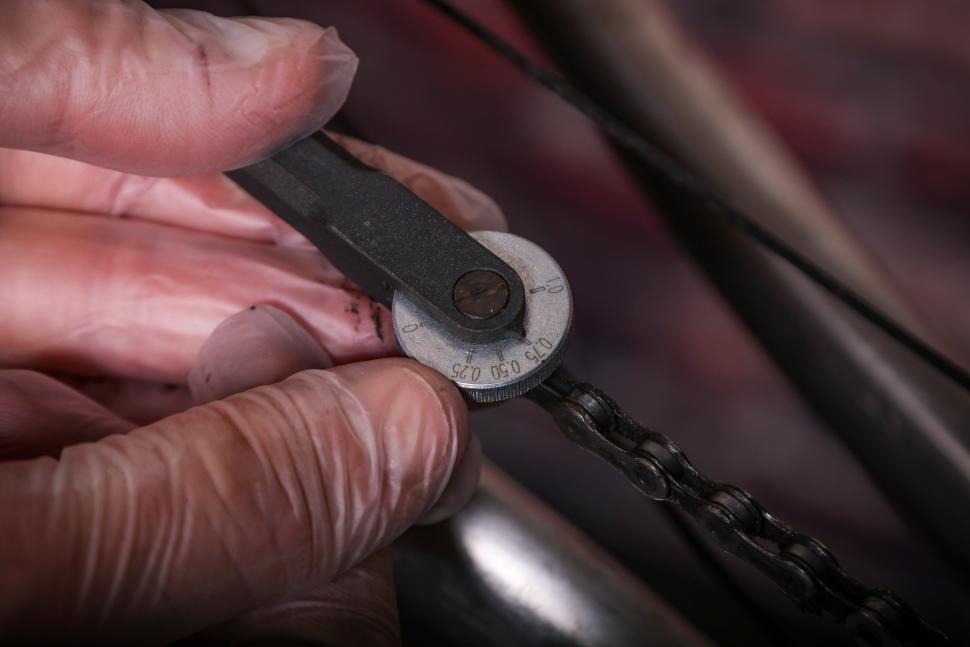
The best way to check if your chain needs replacing is to use a chain wear indicator tool.
Hook the curved end of the tool against the rounded centre portion of a link roller and lay the tool along the chain. Add a little pressure to the pedals to pull the chain taut. The other (gauge) end of the chain wear indicator tool should stand proud (slightly on top of) the link below it. If this is the case, the chain is fine.
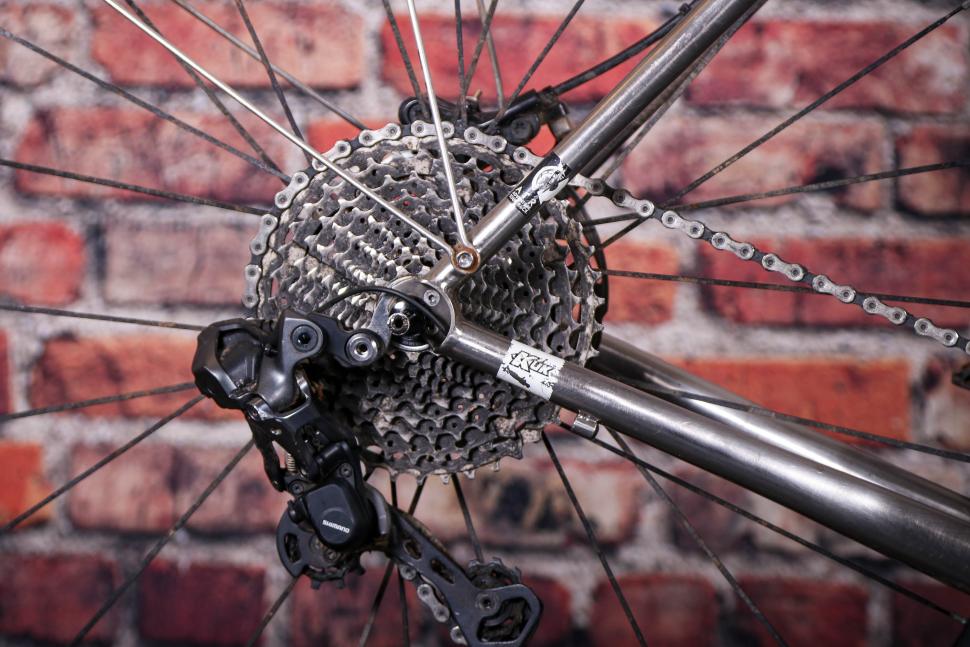
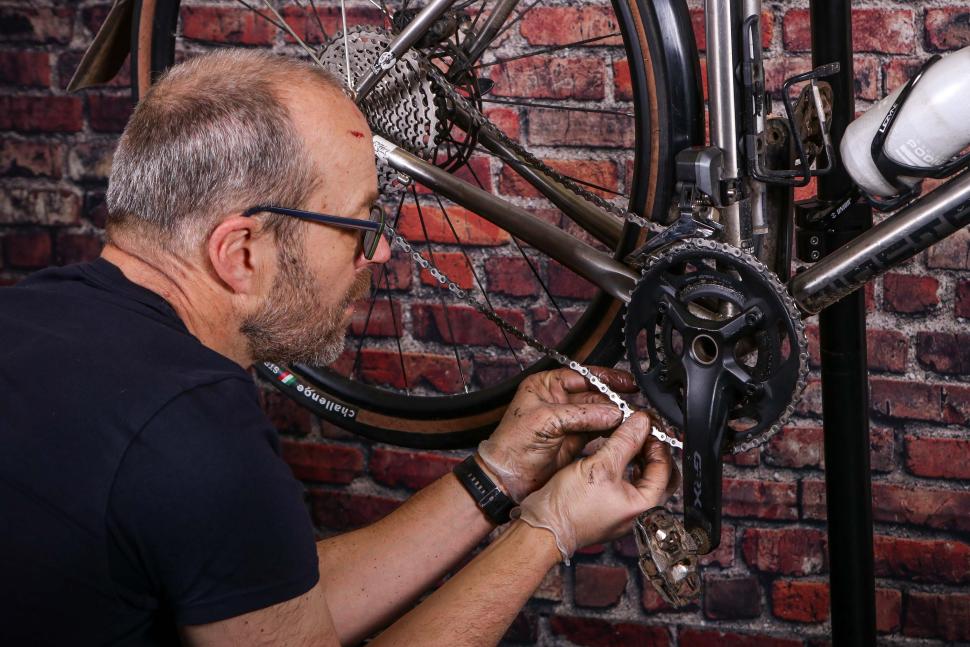
Step 2: Drop the chain or remove rear wheel
Trying to split the chain or access the quick link while it’s on the chainrings and under tension can be tricky.
Either drop the chain off the chainrings to create some slack or remove the rear wheel to make the process easier.
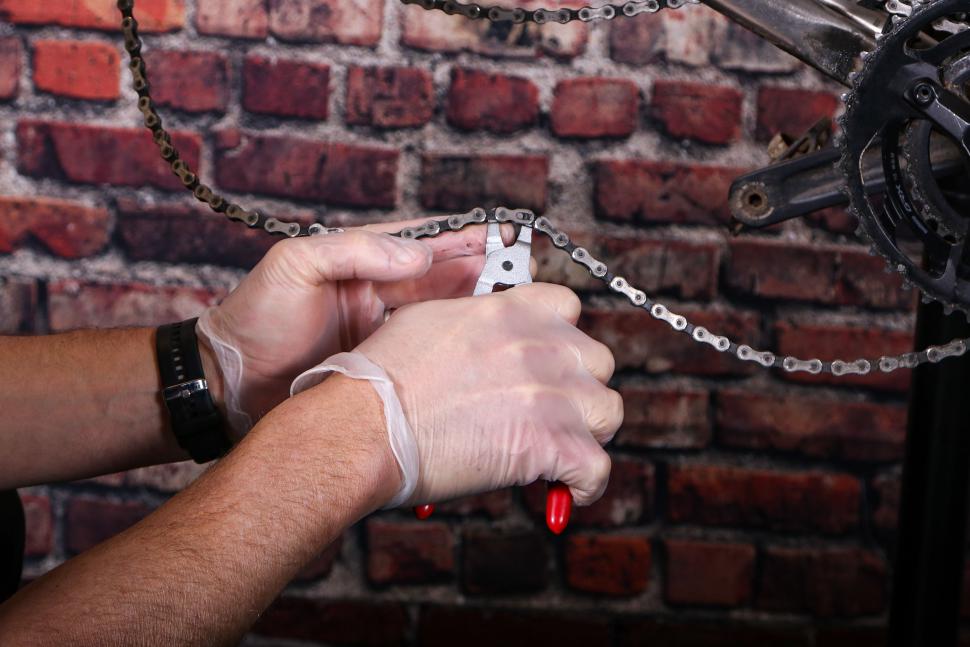
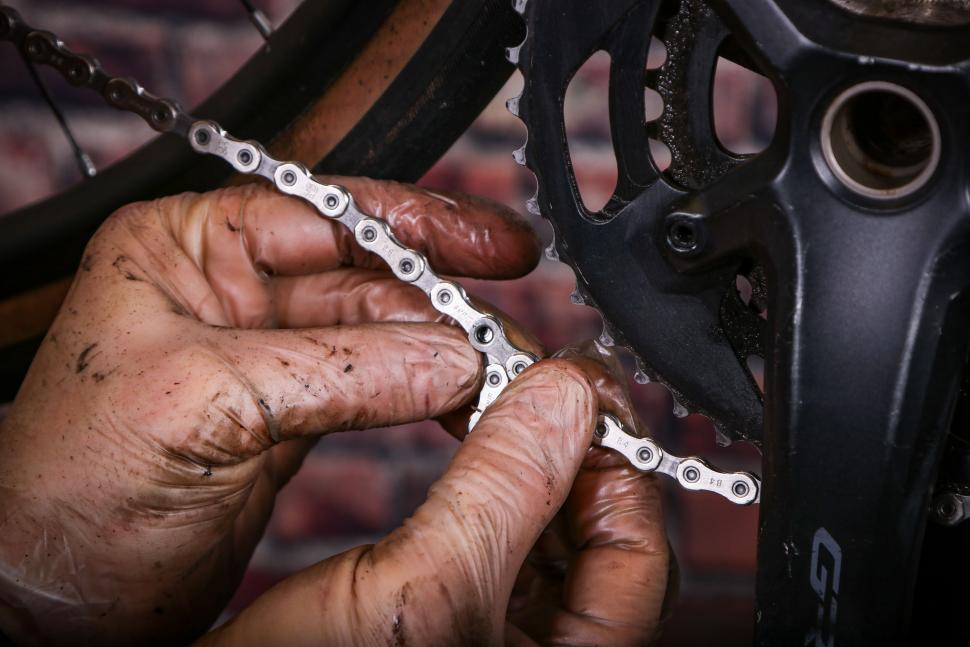
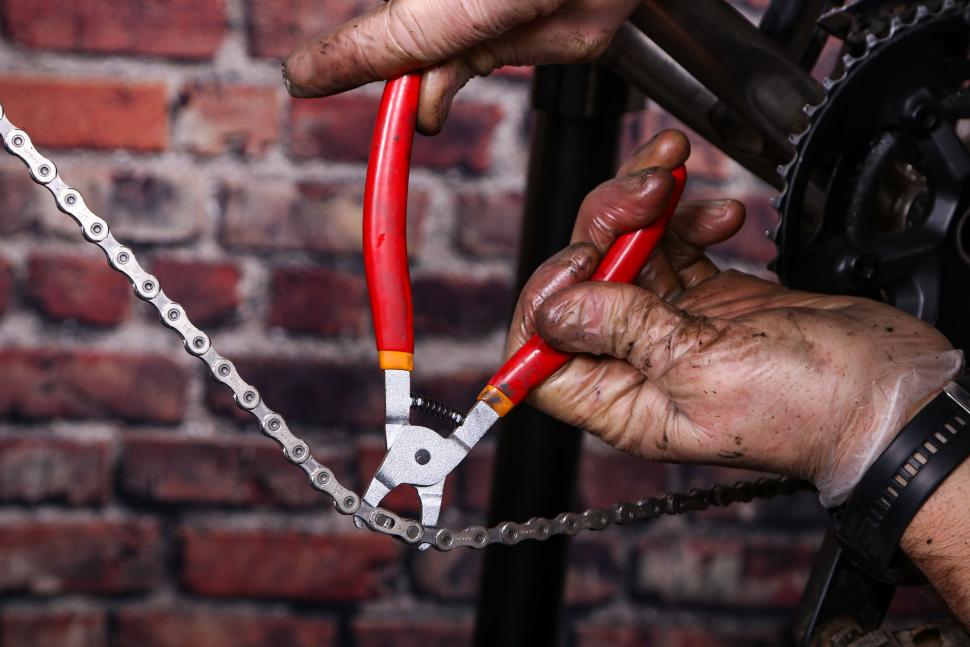
Step 3: Locate the quick link or use a chain splitter tool
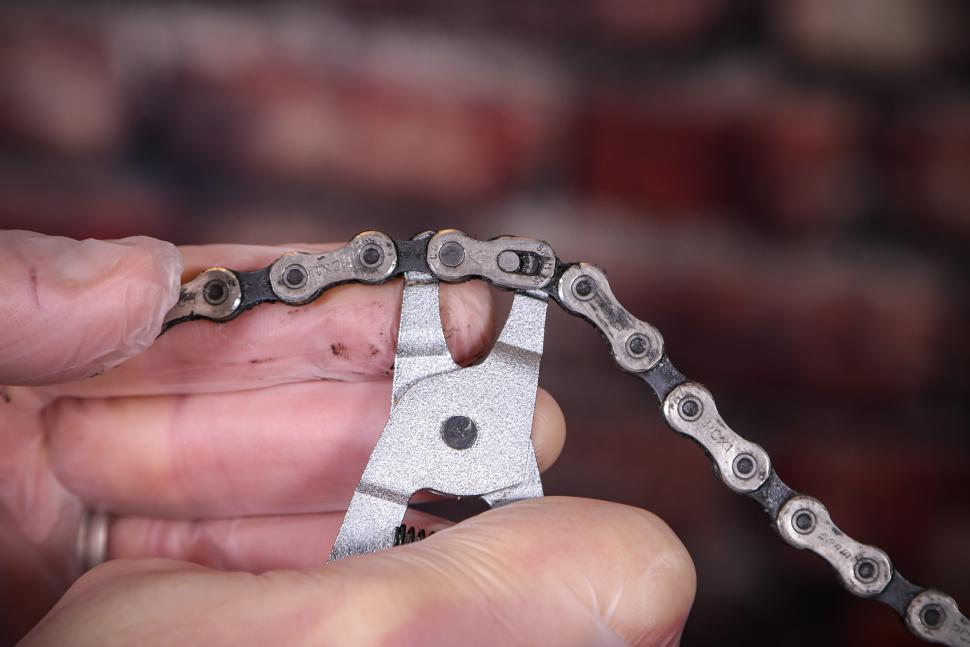
This is a split chain link, a two part 'breakable' link used to make the splitting and joining of a chain an easier and more accurate job. It could be black, gold or silver depending on the brand of chain you use. All work the same way.
Locate the roller axle pins through the two rollers. Press the opposite sides of the quick link plates together and in opposite directions at the same time. The link plates should slide apart, though they'll sometimes need a bit of persuasion especially if the chain is dirty. A set of quick link pliers makes this a lot easier, particularly on a worn chain.
> Smoother shifting: Top causes of bike gear problems and how to fix them
Note: Keep the old quick link from the outgoing chain as an emergency spare even if the rest of the old chain is heading to the bin. We generally tape it to a bit of brake or gear cable, or sometimes under the saddle, so you never get caught without it. You'll be glad you did when you, or a fellow rider, breaks a chain while out on a ride.
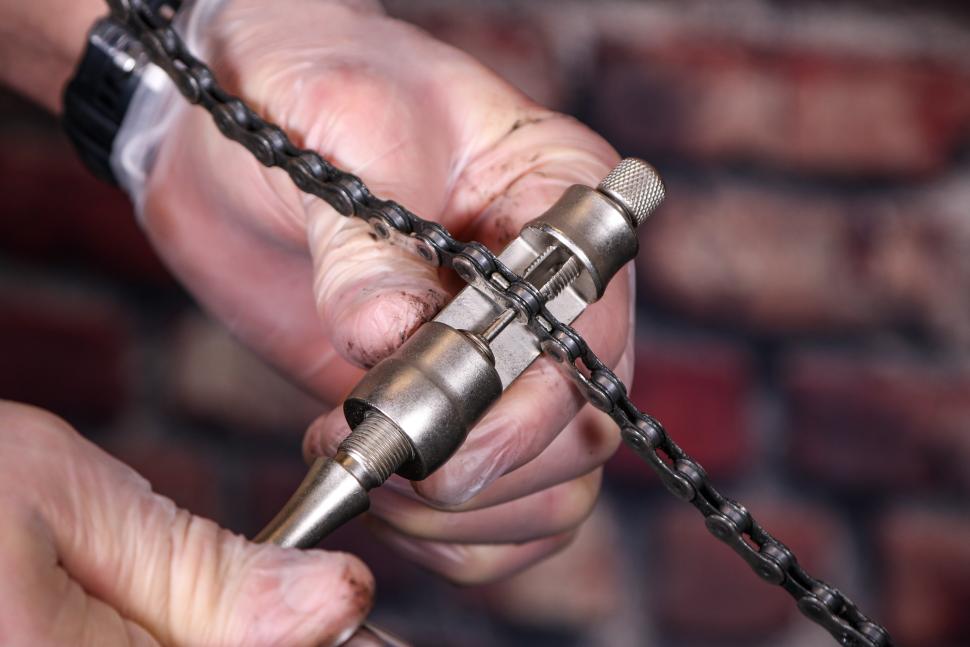
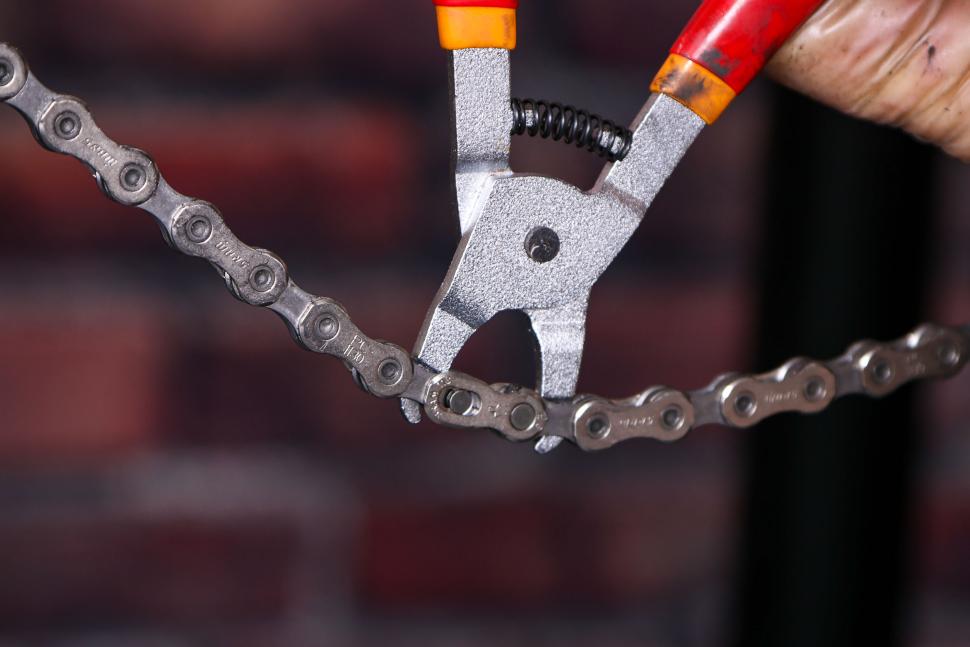
If your chain isn’t one that uses a quick link, you’ll need to use a traditional chain splitter tool. Insert the chain into the recessed housing of the tool ensuring the links are exactly perpendicular to the tool's drive pin, to avoid damaging the edges of the holes.
Screw the handle of the chain tool into the body of the tool, to allow the tool's drive pin to locate squarely onto the head of the chain’s link pin. When it’s all square, drive the link pin out. Don't be tempted to rush and mis-drive the head of the pin, as this can cause the hole in the outer link plate to be damaged and potentially make the fresh join less secure.
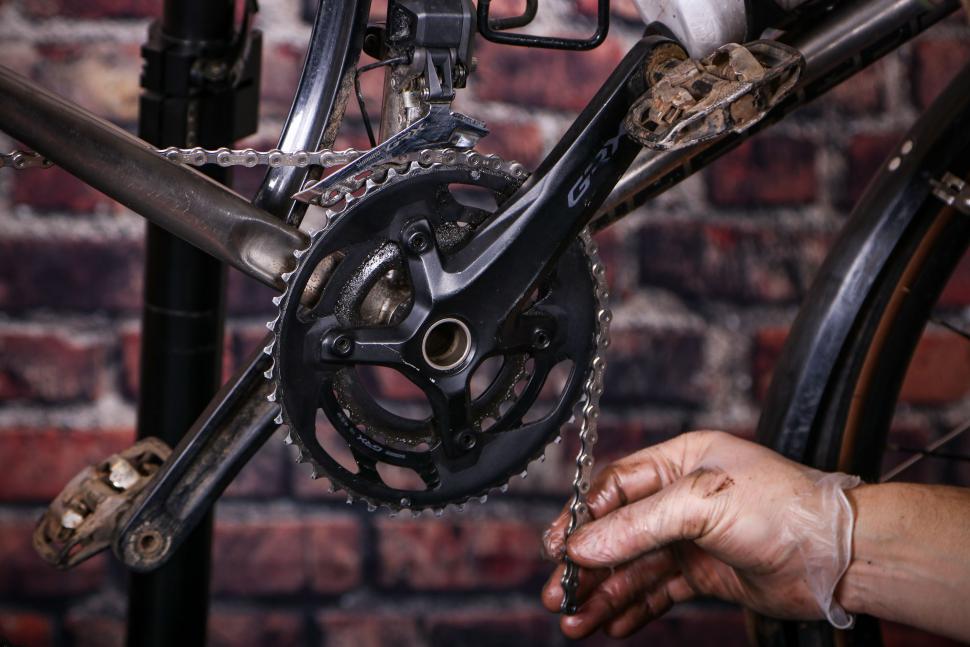
Step 4: Un-thread the chain
The chain can now be unthreaded from the transmission. If you've never bothered to study the route the chain takes around the sprockets, chain rings, and jockey wheels of the rear derailleur do so before removal. Also don't forget to thread it through the front derailleur cage - we've seen it done when rushing. You'll need to get it right when you thread the new one back into the transmission. There is only one way that will result in functioning gears and forward drive.
Step 5: Shorten the new chain
You'll now need to shorten the new chain to the length of the one it's replacing (assuming that was correct). Don't measure the new chain against the old chain as it will have stretched. Instead, count the number of links and then take off the extra links on the new chain using a chain tool.
Most modern road bikes will require five or six links removing, depending on chainstay length and gearing.
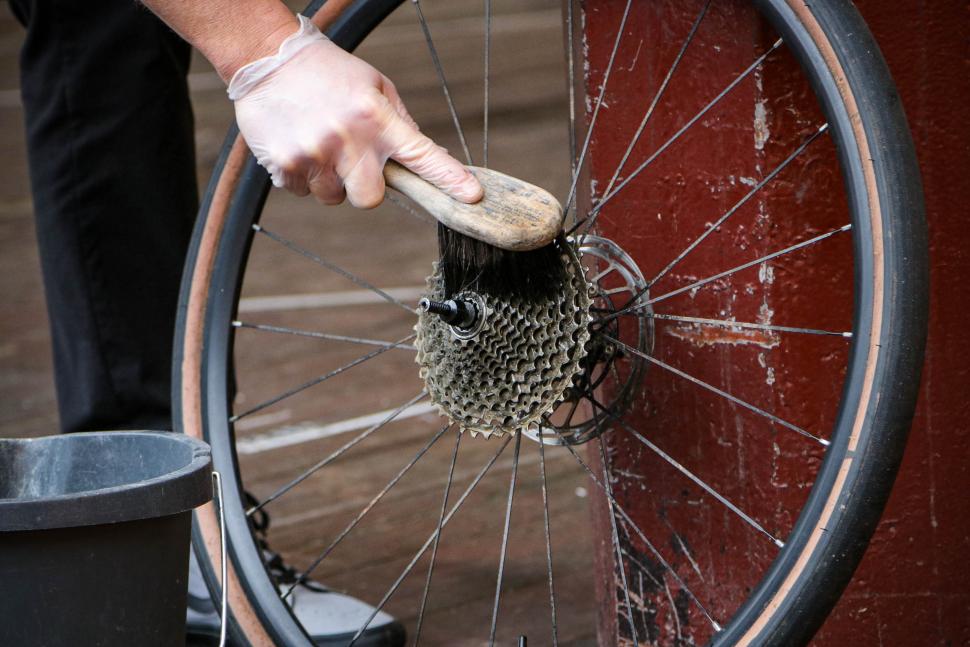
Step 6: Clean your drivetrain
Before fitting your brand-new chain, take the time to thoroughly clean the rest of your drivetrain.
Focus on the cassette, jockey wheels, and chainrings, as there's little point in transferring old grime onto a fresh chain. A cleaner drivetrain ensures smoother operation and prolongs the life of your new chain, so the cleaner the better.
Step 7: Re-thread the new chain
Some Shimano 10-speed chains are directional and must be fitted with the Shimano logos on the outward face of the links. SRAM's AXS 12-speed chain is also directional.
Loop one end of the chain through the front derailleur, the other around the rear sprockets, over the top of the upper jockey wheel and behind the front chain deflector tab in the jockey cage and to the rear of the lower jockey wheel, and inside the rear chain deflector tab. The two loose ends can now be joined.
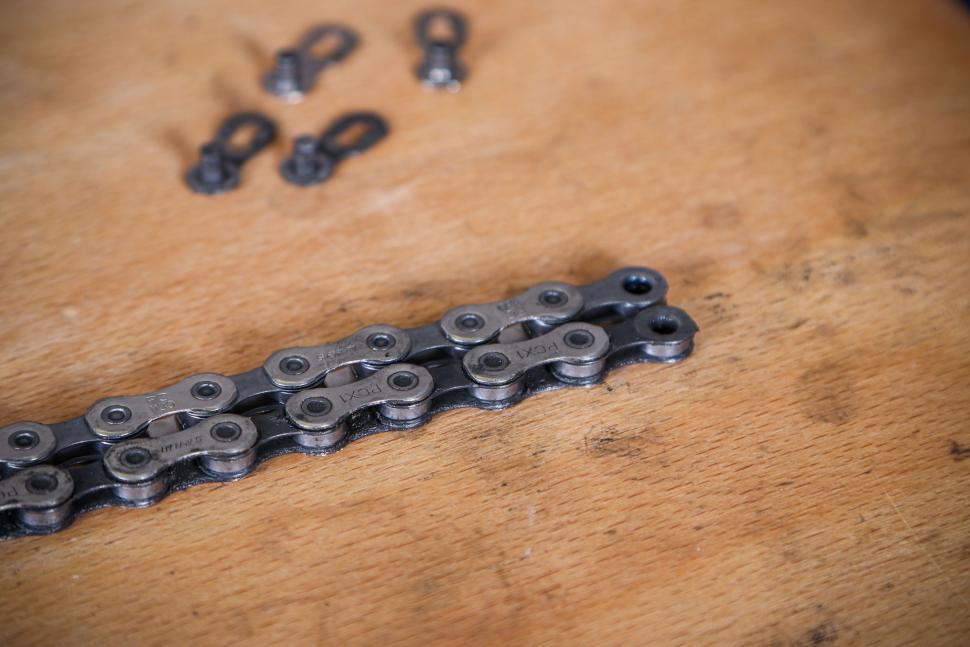
Option 1: Using a quick link
If your chain has a quick link, you hook the two ends together and position it in the top run of the chain. To lock the link, put the bike on the floor with the brakes on and stand on a pedal so the link clicks into place. Alternatively, use master link pliers.
Option 2: Using a joining pin
Some chains use a special joining pin, with a snap-off pointed leader. Bring the male and female ends of the chain together, line up their respective pin holes and insert the pin into the chain. Only the pointed leader section is joining the chain. This must now be pushed home with the chain splitter tool.
Fit the chain tool to the chain in the normal way, to drive the new pin home. Ensure you're well lined up before cranking the chain tool handle. The new pin should slide home with ease, only the last millimetre or so will feel firm at the handle. You're looking to leave the tiny rim at the end of the new pin visible, the same as the other factory fitted ones on the other links. Over pushing the pin will result in the chain link jamming and potentially a chain failure.
With the new link in position you'll need to remove the leader section. This requires a pair of pliers and a sharp angled twist of the wrist to break the leader free. Some cable cutters have a crimper behind the cutters that works well for this job.
Step 10: Free up a stiff link
Sometimes the freshly joined link will run free first time, but occasionally the new join will be a little stiff. This can lead to skipping gears. When this happens we usually use our thumbs to apply a little side pressure to the link, which usually frees the link so it runs and shifts smoothly.

Emily is our track and road racing specialist, having represented Great Britain at the World and European Track Championships. With a National Title up her sleeve, Emily has just completed her Master’s in Sports Psychology at Loughborough University where she raced for Elite Development Team, Loughborough Lightning.
Emily is our go-to for all things training and when not riding or racing bikes, you can find her online shopping or booking flights…the rest of the office is now considering painting their nails to see if that’s the secret to going fast…
Latest Comments
- GravelIsNothingNew 2 hours 4 min ago
Ooh pretty colours put the price up. A radical new retail tactic. ...I'm shocked. LOL.
- Pub bike 3 hours 55 min ago
Also in Richmond, Richmond Park is a prime example of where cyclists are discriminated against and marginalised....
- David9694 5 hours 5 min ago
A363 Bradford on Avon: 'Five cars' crash near golf club...
- stevemaiden 5 hours 6 min ago
The key really is headwind/drag not terrain. It just so happens that climbing speeds are lower so there is often less drag so less extra power is...
- Rendel Harris 5 hours 19 min ago
Same here, the judge can rule that the defendant should go to trial on a more serious charge even if prosecutors are prepared to accept a guilty...
- dubwise 6 hours 6 min ago
And numerous other cases where pedestrians have been killed by oh so innocent drivers.
- Slartibartfast 6 hours 18 min ago
The street in the York letter is at the end of my road and it is, as the writer says, abysmal. Slalom of parked cars and then drivers ignoring the...
- Rendel Harris 6 hours 29 min ago
But wasn't Eurosport always part of the the Sky TV package? I think even if you didn't subscribe to Sky Sports it came as part of the basic deal,...
Add new comment
5 comments
"the old chain is heading to the bin"; recycling?
Like so?
I don't think I've ever replaced a chain and not had to adjust the gears afterwards.
Not following that one. Why would the barrel adjuster now be out of alignment ?
Unless your sprockets are too worn.
"quick link pliers" - one of my best tool purchases