- News
- Reviews
- Bikes
- Components
- Bar tape & grips
- Bottom brackets
- Brake & gear cables
- Brake & STI levers
- Brake pads & spares
- Brakes
- Cassettes & freewheels
- Chains
- Chainsets & chainrings
- Derailleurs - front
- Derailleurs - rear
- Forks
- Gear levers & shifters
- Groupsets
- Handlebars & extensions
- Headsets
- Hubs
- Inner tubes
- Pedals
- Quick releases & skewers
- Saddles
- Seatposts
- Stems
- Wheels
- Tyres
- Tubeless valves
- Accessories
- Accessories - misc
- Computer mounts
- Bags
- Bar ends
- Bike bags & cases
- Bottle cages
- Bottles
- Cameras
- Car racks
- Child seats
- Computers
- Glasses
- GPS units
- Helmets
- Lights - front
- Lights - rear
- Lights - sets
- Locks
- Mirrors
- Mudguards
- Racks
- Pumps & CO2 inflators
- Puncture kits
- Reflectives
- Smart watches
- Stands and racks
- Trailers
- Clothing
- Health, fitness and nutrition
- Tools and workshop
- Miscellaneous
- Buyers Guides
- Features
- Forum
- Recommends
- Podcast
feature
 Hub Bearing-3
When should you replace your wheel bearings? Avoid a wheel write-off with these simple checks
Do you ever check your wheel bearings? As long as the wheels are still spinning, you’re all good, right? That may not be the case. Worn bearings or degraded grease can cause drag and even damage your hubs, slowing you down and eventually stopping your ride. Here’s how to check your bearings to keep the wheels turning.
In terms of how regularly you should be checking your wheel bearings, everyone will be different but if you make a quick check of the bearing's smoothness a regular part of washing your bike, you'll be able to spot issues quickly before they cause far more expensive issues.
How do I know when they need attention?
The most basic method of checking your wheel bearings is listening for a dull whooshing sound that would indicate that they're dry. The front bearings can be checked by simply holding the front end of the bike up with one hand and giving the wheel a sharp spin with the other. The hand holding the bike can also feel any vibrations coming through the frame.
The rear wheel will need to be removed from the bike as freehub noise and drivetrain noise will prevent you from hearing any bearing issue. Hold the wheel by the end caps and spin the wheel.
This is also the perfect time to check for any axle play. With the wheel in the bike, take the rim and move it laterally – wobble it side to side. If there is any movement beyond what would be expected from system flex, then this could indicate worn bearings or (depending on the system) a loose cone.
While this simple check can alert you to a problem, a more thorough inspection is needed and to do that, we’re going to have to get at the bearings. Doing so is quite simple, but the exact method will depend on the wheel that you have and the type of bearing system inside.
Sealed cartridge
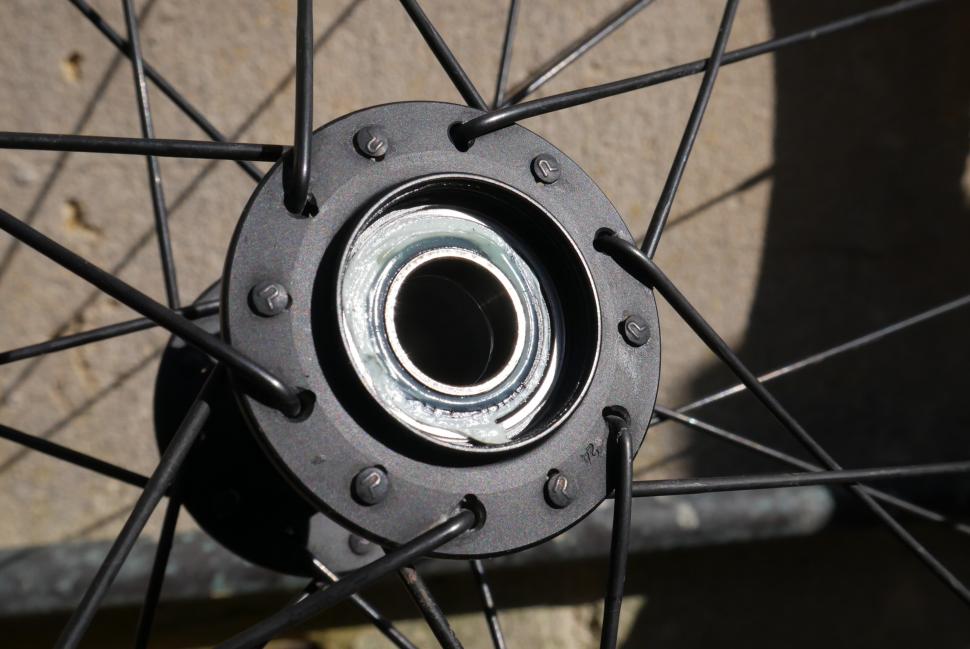
Often, the simplest system to get at is a sealed cartridge design. In many cases, it’ll be a simple process of pulling the end caps off and – voila! – you’ve got access to the bearing cartridge.
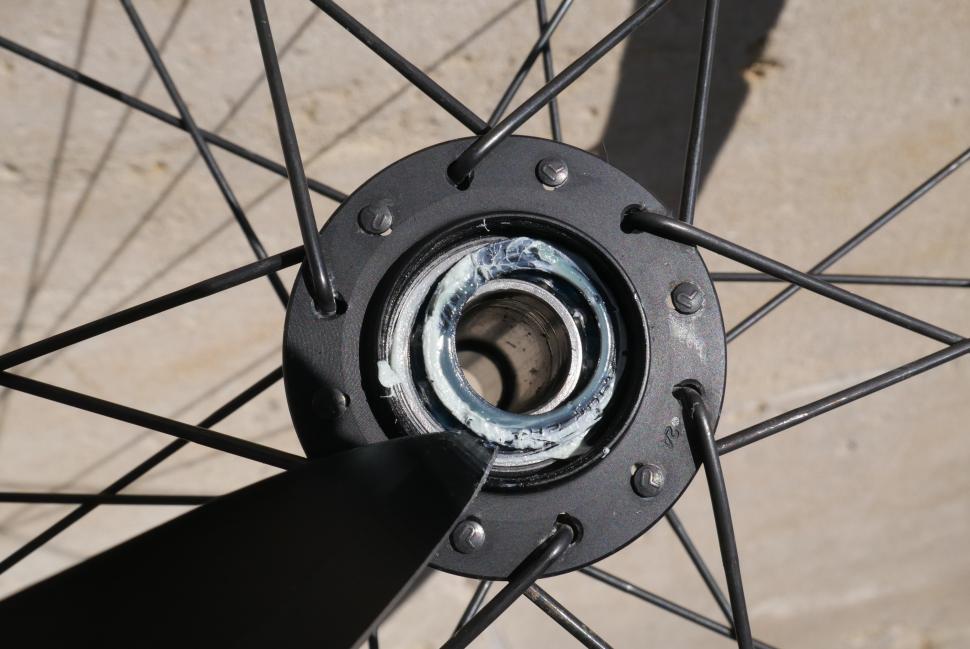
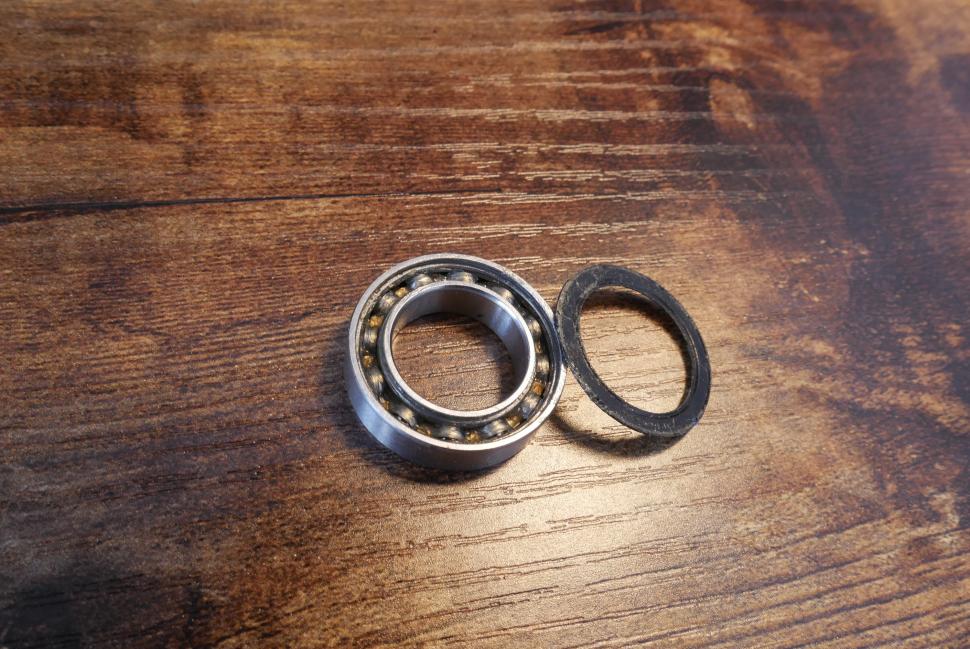
Getting at the bearings inside requires you to remove the bearing seal. Do this carefully with a thin knife. You're trying to lift it away as gently as possible because any damage to the seal will result in water and dirt getting into the system at a later date.
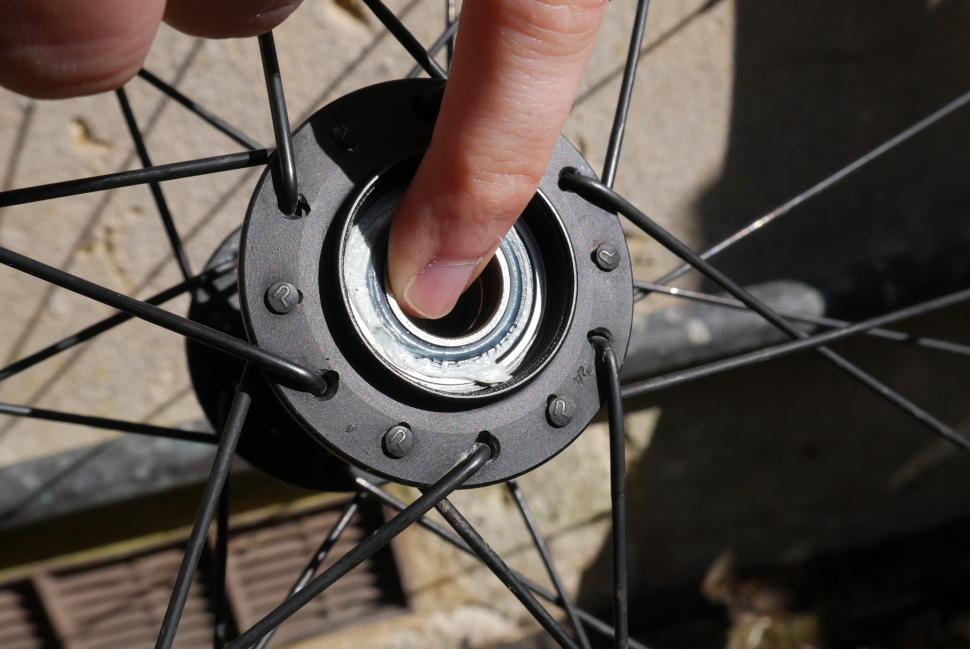
We’re in! Now it is time to assess the condition of the bearings. Before you do anything else, use your index finger to turn the inner bearing race. You’re feeling for any roughness or spots where there seems to be a little bump. If the bearing is just a bit rough, then you can try cleaning and re-greasing. If there are any spots of real resistance or bumps, the bearing has likely pitted (eaten into) the bearing race. If this is the case then a replacement is needed.
Likewise, if you can move the inner race laterally (in and out of the hub) then the bearing probably requires replacing.
With the seal off, a visual inspection can be used to check the condition of the grease. Firstly, there needs to be some! If the sands of time – or sand itself! – has degraded or dried out the grease, then your bearings would love some fresh stuff. A dry system can be fixed by cleaning with a degreaser and reapplying grease. Before you apply new grease, allow the bearing to dry so that the degreaser doesn’t contaminate the new grease.
If you're working on a rear wheel, go carefully with the degreaser as you don't want it to get at the freehub bearings. The sensible approach is to remove the freehub entirely. This will give you access to the drive-side bearing in some hubs and also allow you to check the freehub bearings while you've got everything apart.
Don’t hold back when applying the new grease. You want to coat the bearing liberally, especially if the wheel is going to be ridden through all weather types.
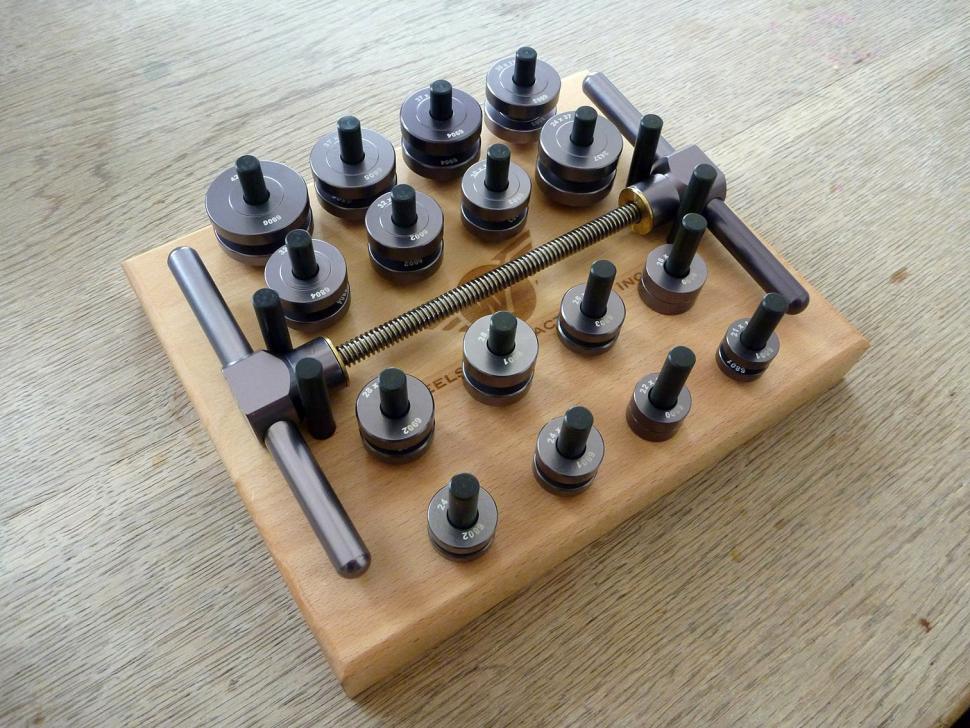
If the bearing needs replacing, it needs to be pressed out, measured and a new cartridge pressed back in. Best practice dictates that removal and installation of cartridge bearings require proper tools which, if you’re doing this job only once a year, can be very expensive. Booking your wheel in at the local bike shop will be a much more cost-effective approach.
Cup & cone
All Shimano hubs and other more traditional hubs like Campagnolo’s use a cup and cone system. These require the use of special spanners called cone spanners. While there might be slight variations between brands, the basic process is to hold the cone with the cone spanner and undo the locknut with another spanner.
With the lock nut and cone removed from one side of the axle, you can slide the axle out of the hub, though you’ll need to be careful as bearings can go flying, especially if the grease inside has dried out, and end up miles away – usually under the fridge.
A magnet is very useful for safely collecting the ball bearings, and don’t forget to put them in a safe place like a bowl. Keep parts from each side of the hub separate. They can wear at different rates and mixing them can accelerate wear. The ball bearings, cups and cones can all be cleaned, allowing you to inspect these parts for wear.
Ideally, you should just need to repack the cups with grease, pop the ball bearings back in and tighten everything up just so. The trick here is to tighten the cones until they are snug against the bearings, removing any unwanted lateral movement of the axle, but not so tight that the wheel can't spin freely. A trial and error approach is required, so take your time and don't be surprised if it isn't right on the first attempt.
If you do spot damage to the cups or cones such as pitting or grooves worn into the cup or cone face then you’ll need to replace the worn part.
Regreasing - what to use
Unless you have ceramic bearings, which require very specific grease, good lithium grease – and plenty of it – will be the ticket for silent, smooth-rolling hubs.
A grease gun can be very helpful at this point as the nozzle will direct grease to where it is needed, preventing wastage. If you haven’t got one, spread the grease with your little finger and try to press it in between the ball bearings.
While we’re sure that there are some rolling resistance savings to be made by using special grease sparingly, unless you’re working on race wheels that will only be used in the dry, we’d advise against it.
Replacement - what do I need?
With the number of hub designs on the market, sourcing replacement parts for your hubs can seem daunting. The best bet is to go to the manufacturer of the hub to find the part that you need. Ideally, they’ll send you the part, but if not, at least you should now have the exact name of what you’re looking for.
But if you’ve got a set of vernier callipers, you can easily get the measurements that you need. Loose ball bearings are measured using the diameter of the ball. You’ll probably find them to be 3/16in if you’re measuring bearings from a Shimano hub.
> Should you buy ceramic bearings?
Cartridge bearings are measured on the size of the actual cartridge, not the bearings inside. Again, break out the vernier callipers and take measurements for the outer diameter (O.D), inner diameter (I.D) and width (W). Put them together in this order (O.D)x(I.D)x(W) and you’ve got the replacement that you need.
If you’re truly stuck, a trip to your local bike shop is the way to go. They will have the knowledge of what they’re looking at, the tools to take the bearings out, measure them and replace or repair as necessary.
Latest Comments
- imajez 25 min 16 sec ago
- looks like someone has fallen for the steel is real markerting BS. I only care how a bike rides, not what it is made of. I had a lovely steel...
- lonpfrb 1 hour 45 min ago
That argument is ignorance of the widespread height and width restrictions to be found on the many minor roads that were originally created for...
- David9694 4 hours 1 min ago
cyclists should be made to have number plates - Interesting police video here of the range of illegal number plates - we'd got, as the caption says...
- rookybiker 5 hours 14 min ago
The trailer seems to connect to both ends of the rear axle. Can it do tight corners without dragging the tyre sideways?
- froze 5 hours 17 min ago
Motorists have always been unkind to cyclists, but distracted driving is adding to the problem....
- Destroyer666 6 hours 10 min ago
Have you owned Bont shoes? In my experience even the widest Lake shoes have had a bizarre form of narrowing way too much in the toe area. But the...
- froze 6 hours 38 min ago
Not sure if this is possible, but this news letter goes out all over the world, and some places like Decathlon does not send stuff to America, in...
- Hirsute 7 hours 23 min ago
I'm confused as to why you'd need bib shorts indoors.
- Oldfatgit 7 hours 51 min ago
I'm sure you were being sarcastic... however ... Lewis Hamilton lives in Monaco. Yet another car driver that doesn't pay any tax


Add new comment
7 comments
On the article about awful Ever Ready lights I made the claim that I still use early 90s and late 90s groupsets on 2 of my bikes, with lights coming on in leaps and bounds, what I didn't say (or remember) is that the seals on Shimano hubs have come on massively too, they used to be awful. These days the hub bearings might not need doing before I kill a rim.
Adjusting cup and cone, especially with quick release skewers, need not be quite so trial and error. Those lovely people at Park have some incredible advice on their very helpful website-
https://www.parktool.com/blog/repair-help/hub-overhaul-and-adjustment
Please don't use a magnet to remove a ball bearing. You will condemn it to forever attract exactly that which it is trying to avoid. Like an endless fresher's week.
If you are getting metal grit in with your bearings, you are doing something wrong..
For cup & cone bearings I was advised to get chrome steel balls with good roundness (grade 100 or even lower) and avoid grade 1000 such as the Weldtite branded ones. Front wheels usually take 10 or 11 x 3/16" ball bearings per side, rear wheels 9 x 1/4" per side. I buy mine from https://simplybearings.co.uk/
When removing loose balls I stand the wheel over a foil or plastic tray and drop them one at a time into the tray. If they have been used for a while they are cheap enough that I put new balls in anyway (after ensuring the race and the cone are spotlessly clean).
The Weldtite grease gun is great, I wish I'd bought one sooner.
I love my Fulcrum wheels, but I do have to replace the bearings quite often. I am not sure what the cause is. I don't cycle in the rain if I can avoid it and the roads here are pretty good too.
It does affect front and rear wheel.
By now I have all the tools to remove and press the bearings in and enough practice to do it in 15 minutes or so.
The annoying thing is mostly the price of the original Fulcrum bearings and that they have different sizes for front, rear and freewheel bearings. They are also not so easy to buy online.
I have to find some third party supplier for these.
I've plenty of customers with Fulcrums..of various years and also model "number"....the bearings are common available ones, I keep them in stock. I also have noticed that the non drive side and the freehub "nose" bearings are more susceptible to wear than the mid hub bearing in the rear wheel....now Miche wheels ....nice easy to get, cheap bearings , allowing the change to high quality for less than some standard bearings on other wheels.... Whatever hubs you have... decent grease...ways decent grease....
Wych Bearings are an excellent source of bike bearings and allow you to find them using ID, OD and Width measurements. They typically have chrome steel and ceramic versions at various price points.