- News
- Reviews
- Bikes
- Accessories
- Accessories - misc
- Computer mounts
- Bags
- Bar ends
- Bike bags & cases
- Bottle cages
- Bottles
- Cameras
- Car racks
- Child seats
- Computers
- Glasses
- GPS units
- Helmets
- Lights - front
- Lights - rear
- Lights - sets
- Locks
- Mirrors
- Mudguards
- Racks
- Pumps & CO2 inflators
- Puncture kits
- Reflectives
- Smart watches
- Stands and racks
- Trailers
- Clothing
- Components
- Bar tape & grips
- Bottom brackets
- Brake & gear cables
- Brake & STI levers
- Brake pads & spares
- Brakes
- Cassettes & freewheels
- Chains
- Chainsets & chainrings
- Derailleurs - front
- Derailleurs - rear
- Forks
- Gear levers & shifters
- Groupsets
- Handlebars & extensions
- Headsets
- Hubs
- Inner tubes
- Pedals
- Quick releases & skewers
- Saddles
- Seatposts
- Stems
- Wheels
- Tyres
- Health, fitness and nutrition
- Tools and workshop
- Miscellaneous
- Tubeless valves
- Buyers Guides
- Features
- Forum
- Recommends
- Podcast
feature
 Shimano road discs - bleeding the system 4
Getting ready for disc brakes: do you need a whole new set of workshop skills to maintain hydraulic discs?
With hydraulic disc brakes becoming so common, there are inevitably going to be a good number of you that are set to make the leap from working on rim brakes to maintaining hydraulic discs. Bleeding them is scary at first; you’ll need to learn that oil and brake pads don’t like each other and there are some tricks for maintenance.
The good news is that while you will need a new set of workshop skills for hydraulic disc brakes, the process isn’t much more complicated than re-cabling a rim brake. Oh and the world of mountain biking is looking at our trepidation and thinking: “That’s cute”. They’ve been dealing with disc brakes for years. It takes a little getting used to, but once you’ve got the maintenance skills dialled, discs are easy.
New tools
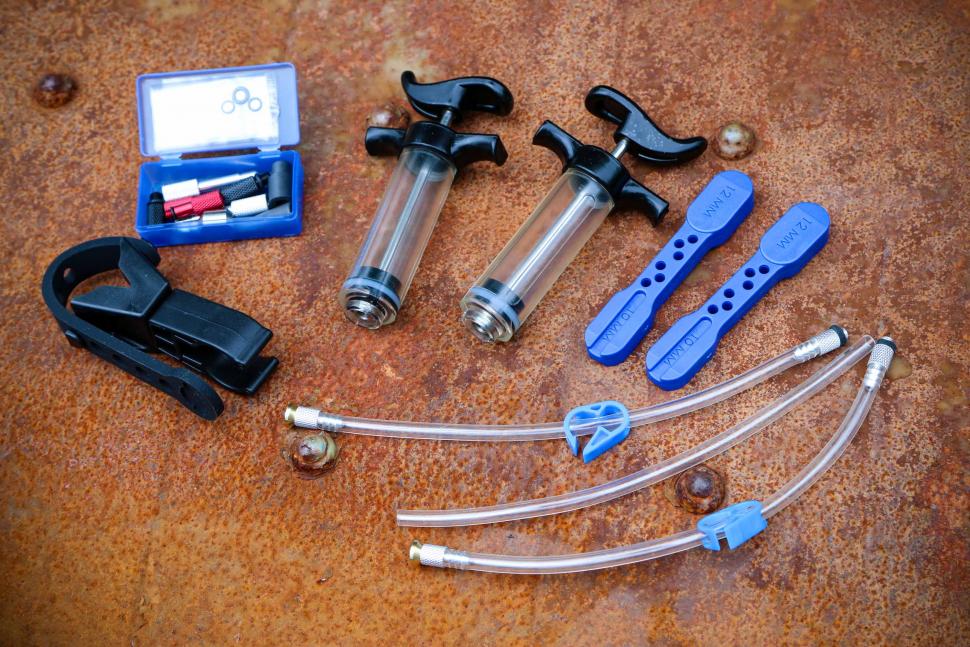
Before you go disconnecting those brake hoses, you’re going to need some new tools. A bleed kit that is specific to your system is essential. Shimano’s is here, Campagnolo’s is here and SRAM’s is here.
You’ll need good cable cutters if you’re intending to trim down the hose or install a new system.
You also need something to hold the hose while you press or tap in the new barb. Shimano systems come with two plastic pieces that allow you to hold the hose safely in a vice or a set of mole grips. Add in a hammer and you’re good to go, but you can get an all-in-one tool that does all of the above. They can get expensive though.
Working on a bike with disc brakes might mean that you'll be reaching for your spanners for the first time in a while. You’ll need some rather small spanners – down to a 6mm size for some systems.
New skills
Bleeding
Let’s start with the assumption that you, the new disc brake user, have bought your bike from a reputable bike shop and the disc brakes have been set up perfectly, including the mechanic bedding them in.
You will most likely walk out for the shop and not have to touch those brakes for hundreds if not thousands of miles. That’s the beauty of discs - they’re pretty easy to live with if set up well and then ridden in decent conditions.
The time will come, though when you notice that the brake lever is getting quite close to the handlebar before you get any braking. It’s time for a brake bleed and while you’re at it, a new set of pads to be on the safe side.
Before we go any further, stop to check what fluid type your system uses. Shimano and Campagnolo use mineral oil. SRAM uses DOT fluid. Never mix and match.
Then check what replacement pads you require. See below for help in identifying what you need.
The actual ‘bleeding’ of the brakes is a simple case of removing air from the hydraulic system. The processes for Shimano, SRAM and Campagnolo are all slightly different.
Park Tool’s Calvin Jones (with his fabulous moustache) takes us through the process for Shimano.
The process for SRAM differs slightly between the older road system…
…and the newer Bleeding Edge system.
Instructions for a Campagnolo system are here.
Cleaning
Part of the process of bleeding the brake is cleaning any oil spills with isopropyl alcohol. If you don’t do this and the oil sits under the shifter hood or bar tape, it will cause these parts to slide around.
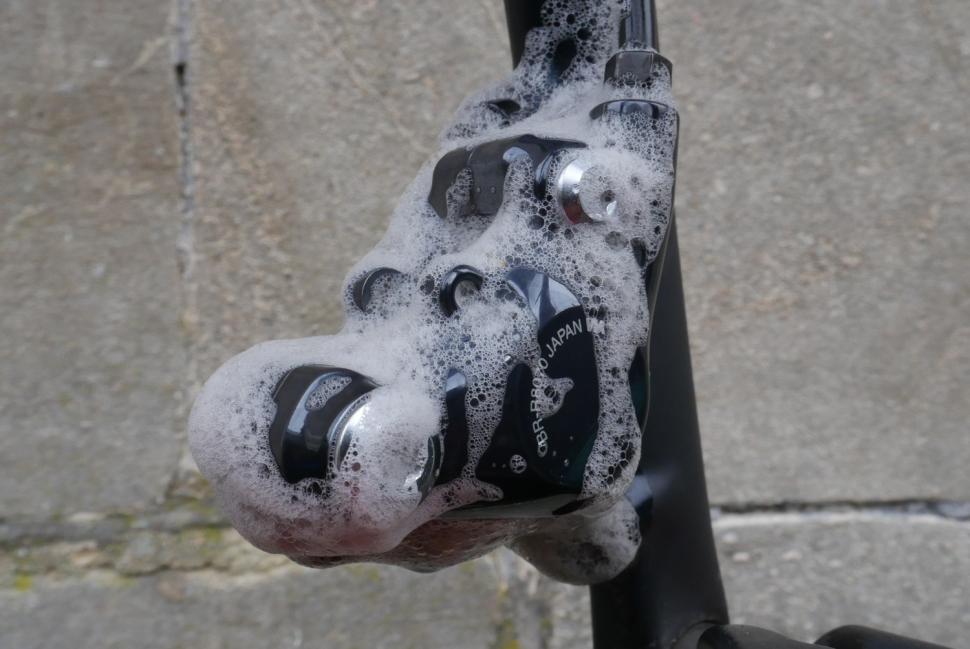
When it comes to general cleaning, there are two distinct areas to consider. First are the parts of the rotor and calliper that do not contact each other under braking. An example of this is the calliper shell or the central part of the rotor. These areas can be cleaned with soap and water along with the rest of your bike. They shouldn’t need degreaser. Rinse everything with clean water before you do any braking.
The other area is the contacting surfaces. This is the outer part of the rotor and the brake pads themselves. Neither should actually need cleaning as braking heat will take care of anything, but if you do want to do some cleaning, isopropyl alcohol (make sure it is 100%) is the best stuff as it leaves no residue.
If, after numerous cleaning sessions and a few stretches of hard braking, the brakes are still squealing, you most likely have contaminated pads. You can try burning the contamination off, but more often than not, replacement pads are required.
Checking for wear
Both pads and rotors will wear out eventually. For safety and braking performance, you’ll need to check your brakes on occasion, though how often you’ll need to replace one or both parts will depend on the conditions that you ride in.
Pads
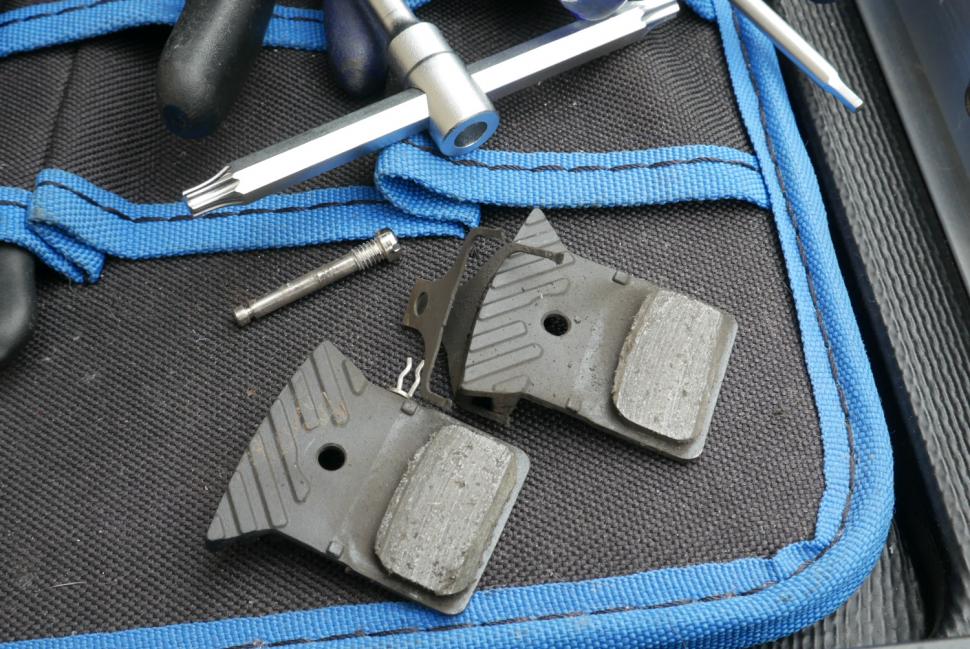
Just like rim brake pads, you’ll need to check that the pads in your disc system don’t wear beyond a minimum wear limit. This limit varies between brands. Shimano says to change pads when the pad gets down to 0.9mm. SRAM is more conservative at 2.5mm. A digital vernier calliper is going to be your friend for this. They're also great for measuring bearings and getting your bike millimetre perfect. Campagnolo keeps the same system as rim brake pads with a wear indication groove. Can’t see it? You need to change those pads.
One thing to look for is glazed pads. This is where heat makes the surface of the pad shiny. It reduces braking power but the fix is easy. Simply file down the pad carefully with a flat file until the glazed surface is gone.
Rotors
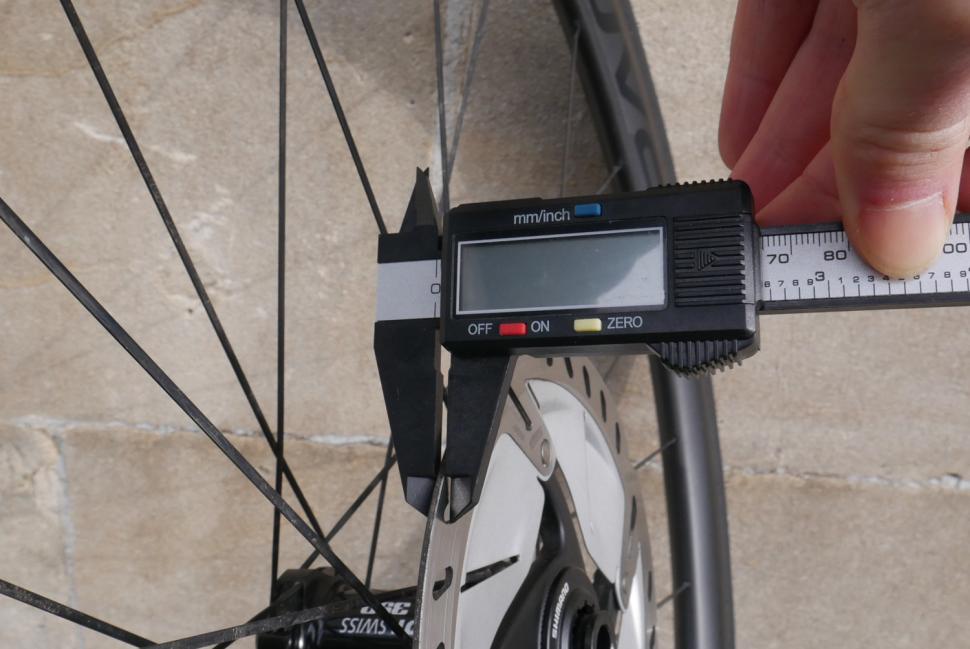
Once a rotor wears to its minimum recommended thickness, it needs replacing. For Shimano this is 1.5mm, for SRAM it's 1.55mm and other brands are similar. It is generally printed on the rotor and you can break out your digital vernier calliper again.
Rotors can also overheat. The clear sign that they are doing so is a change of colour. Rotors will firstly turn a slight yellow and can progress through to brown and then purple. While it might look quite cool, it’s time to replace the rotors. Take this opportunity to consider how quickly you cooked the rotors. If you did it in a short space of time then you might want to consider using larger rotors and/or rotors with cooling technology to deal with the heat buildup. This is also a consideration for heavier riders that are heading to hilly or mountainous terrain. It’ll cost you a few grams but it will be worth it.
Truing rotors
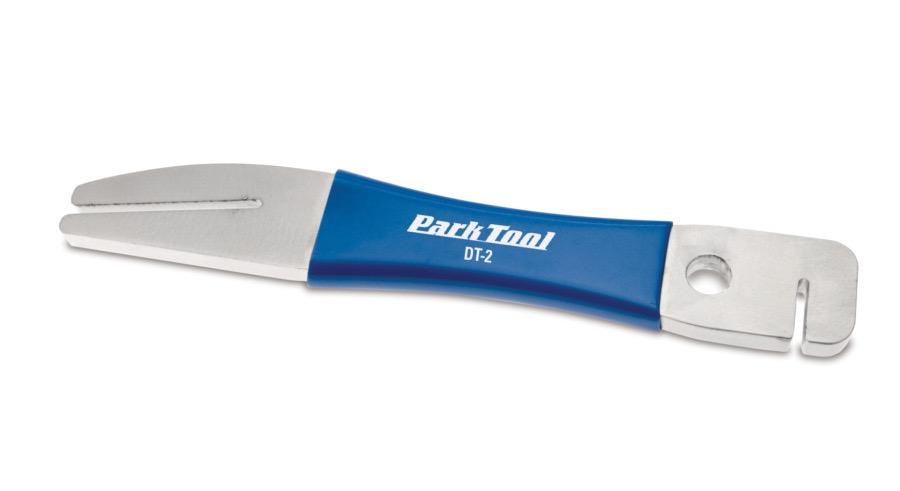
The disc rotor can warp due to heat build-up or being knocked. Straightening them is a simple case of finding where the bend is and then using a proper rotor truing tool to bend it back.
Bedding the brakes in
We touched on bedding in your brakes at the start of the article. If you get a new disc-brake system or you replace the pads and rotors, you need to bed in the brakes, which is the process of depositing some of the brake pad onto the rotor.
A few hard pulls on the brakes while you ride up and down the road should do it. This will get your brakes working correctly.
New lessons
Oil ruins everything!
If you do get oil on the rotor – be that brake oil or chain oil – then it’s going to work into the pad too and you’re going to reduce the stopping capabilities of the brake significantly.
Keep those pads away from the bike when you’re doing any bleeding and don’t go spraying frame polish or an aerosol lubricant near the rotor or calliper.
Callipers are self-adjusting
As the brake pads wear down, the pistons will retract less and less to maintain the gap between the pads and the rotor.
So where you’d have to adjust a rim brake over time, disc brakes do that for you.
But pistons can stick
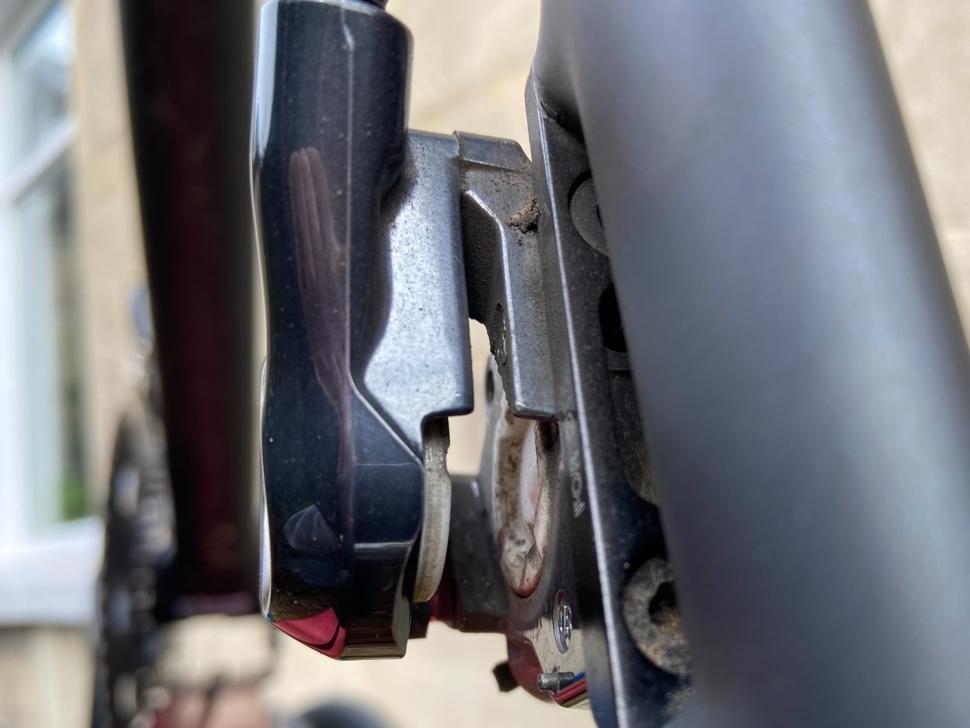
Here is an example of a sticky piston that has caused the calliper to become unbalanced. The left piston, as we look at it, protrudes far more than the right piston. The reason for this is as follows.
As the piston pushes out of the calliper under braking, it becomes exposed to collecting brake dust which, over time, can create just enough friction to cause the piston to become ‘sticky’. This will result in one or both brake pads not retracting properly after you release the brake.
Cleaning this brake dust off the piston with isopropyl alcohol and a cotton bud requires you to very carefully expose the pistons by gently pulling on the brake lever with the wheel and brake pads removed until the majority of the piston is exposed. Don't go too far or you will pop the piston out and that is likely to lead to you buying a new brake calliper. Once you've cleaned them, dab a little of the brake oil on the piston rim before pressing the pistons carefully back into the calliper.
Don’t pull on the brakes without something between the pads
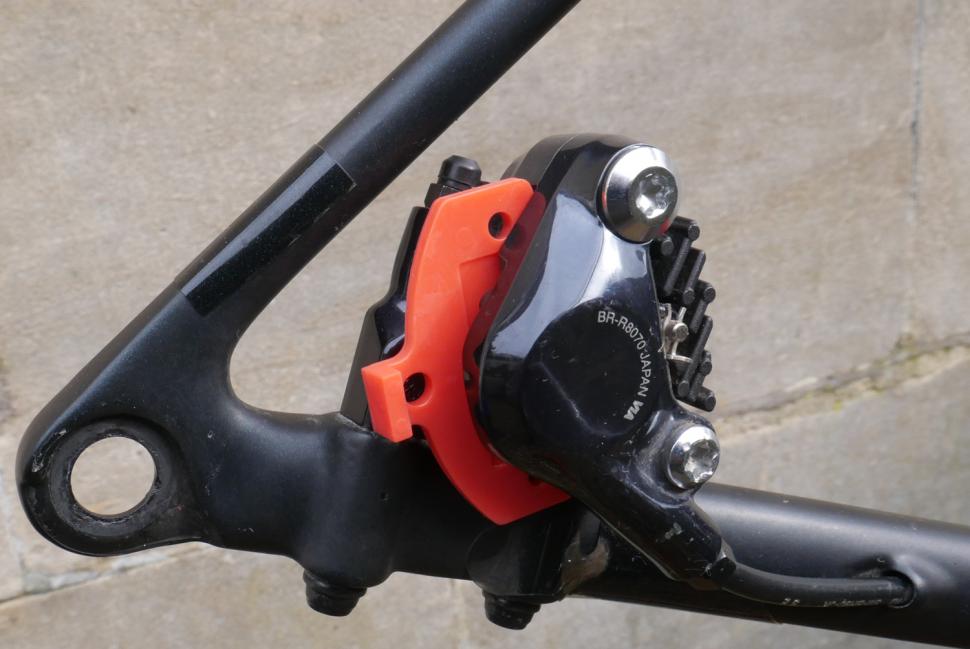
Despite our advice above, in general, you shouldn't pull on the brakes without something between the pads. If you’re travelling with your bike and one or both of the wheels are out, slide in the travel spacer that came with the bike. If you’re using your bike on an indoor trainer, do the same.
Why do you want to avoid this? Hydraulic disc brakes are designed to self adjust so that the brake pads always travel a set distance before contacting the rotor. If you remove the rotor from between the pads, the system, when activated, will continue to press and reset further and further into the middle of the calliper. Like above, you risk popping a piston out of the calliper or introducing air into the system. To avoid a problem, get into the habit of using those travel spacers.
If you have pulled on the brakes without something between the pads then the best practice is to clean the pistons as described above.
While this might seem like a lot to get to grips with, a few months of living with disc brakes should allow you to see that their maintenance isn’t particularly challenging.
Did we miss anything or do you have a top maintenance tip for disc brakes? Leave it in the comments below.
Latest Comments
- nniff 2 sec ago
We keep on being told that cyclists should take a test, carry insurance etc. THe Highway Code is explicit in its instruction to both drivers here....
- redimp 8 min 52 sec ago
I prefer the gumpy woman to most moaners as at least she said "some cyclists" and not all
- FredC123 18 min 15 sec ago
Cancelled my sub immediately. It's an example of the audience is the product, as with social media: TNT+ will have ads despite the £31pcm and we...
- leelang229 26 min 44 sec ago
Have you thought about doing your own respray? I did my old Cube, using "Spray.bike" powder coat rattle cans. I was really pleased with the results.
- Wingguy 31 min 53 sec ago
Well... the 'A' in CdA stands for area, so of course you can make a tiny, tiny bike and claim that it is more aerodynamic. That doesn't mean it is...
- chrisonabike 1 hour 6 min ago
Hmm... not up-to-date with the funding / business model of Lime but most previous dockless bike systems I've been aware of were seem to be at best...
- chrisonabike 1 hour 30 min ago
Reminds me of Cold War Steve's video for Sleaford Mods...
- Hirsute 1 hour 36 min ago
I have a couple of head torches, but they look like this Nicely angled down so you can see where you are treading.
- The_Ewan 2 hours 3 min ago
I think that part of the reason for the limited mount is that the shaped 'road' beam means that it can't be mounted upside down, otherwise you'd...
- momove 2 hours 7 min ago
Thanks for posting. Have signed as well and pleased to see it's over 100,000 so it will at least be raised....
Add new comment
1 comments
Good summary. thanks