- News
- Reviews
- Bikes
- Accessories
- Accessories - misc
- Computer mounts
- Bags
- Bar ends
- Bike bags & cases
- Bottle cages
- Bottles
- Cameras
- Car racks
- Child seats
- Computers
- Glasses
- GPS units
- Helmets
- Lights - front
- Lights - rear
- Lights - sets
- Locks
- Mirrors
- Mudguards
- Racks
- Pumps & CO2 inflators
- Puncture kits
- Reflectives
- Smart watches
- Stands and racks
- Trailers
- Clothing
- Components
- Bar tape & grips
- Bottom brackets
- Brake & gear cables
- Brake & STI levers
- Brake pads & spares
- Brakes
- Cassettes & freewheels
- Chains
- Chainsets & chainrings
- Derailleurs - front
- Derailleurs - rear
- Forks
- Gear levers & shifters
- Groupsets
- Handlebars & extensions
- Headsets
- Hubs
- Inner tubes
- Pedals
- Quick releases & skewers
- Saddles
- Seatposts
- Stems
- Wheels
- Tyres
- Health, fitness and nutrition
- Tools and workshop
- Miscellaneous
- Tubeless valves
- Buyers Guides
- Features
- Forum
- Recommends
- Podcast
How to set your saddle height - get it right for improved comfort and power
There are few more important metrics to consider when setting up your bike than how and where you sit. Obviously, the saddle is the physical where, but it's precise positioning, and in particular, its height, has a direct effect on the power you can apply to the pedals and your fundamental comfort while riding. The two issues are connected, so here's how to get it right.
Our guide below shows you what we believe is the best method to set your saddle height. We've included a list of the tools and materials that you will need to complete the job and in some cases where you can buy them. If there are others that you prefer then feel free to let everybody know in the comments.
Tools & Materials
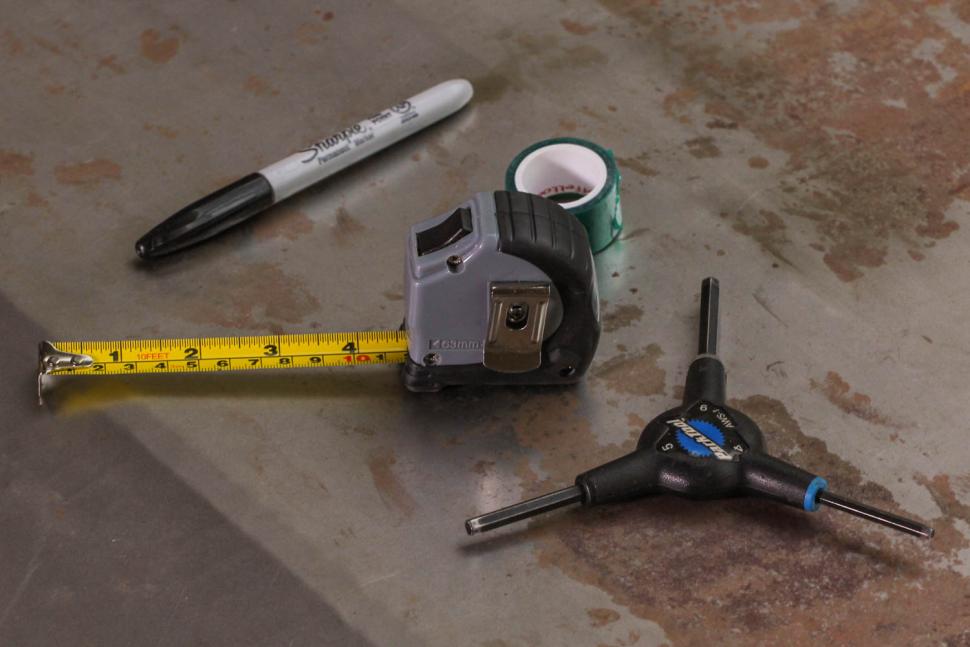
- Tape measure
- Allen keys
- Friend
- Electrical tape
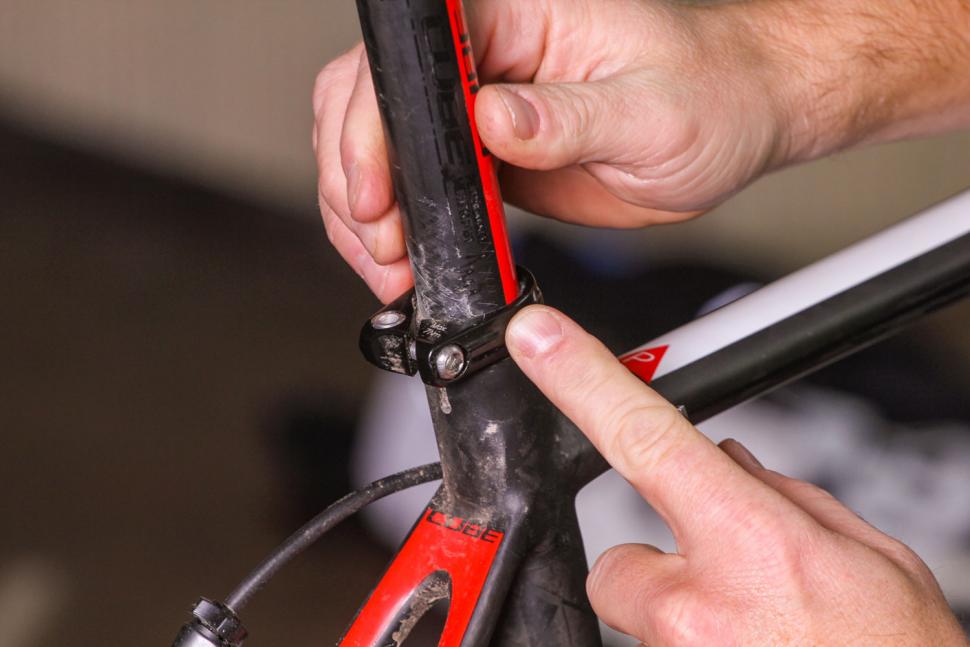
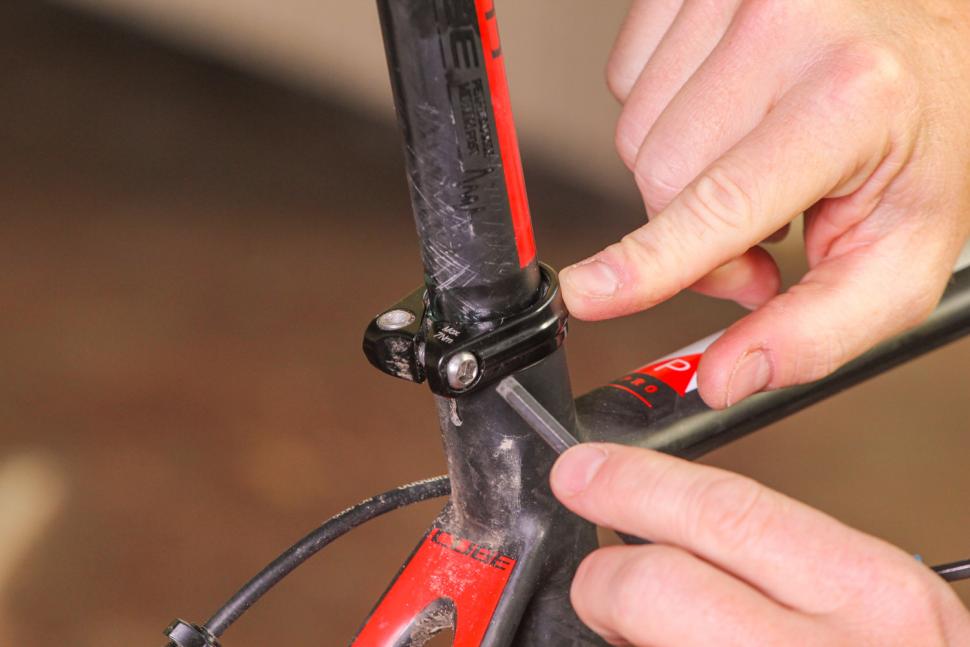
1. Seat post.
Adapting the saddle height to suit your personal physiology is relatively easy thanks to seat posts which slide up and down the inside of the seat tube. The seat tube is connected at the bottom bracket to the cranks where your power is transferred to the bike. Setting the saddle height measurement will depend on your personal measurements from crotch to foot.
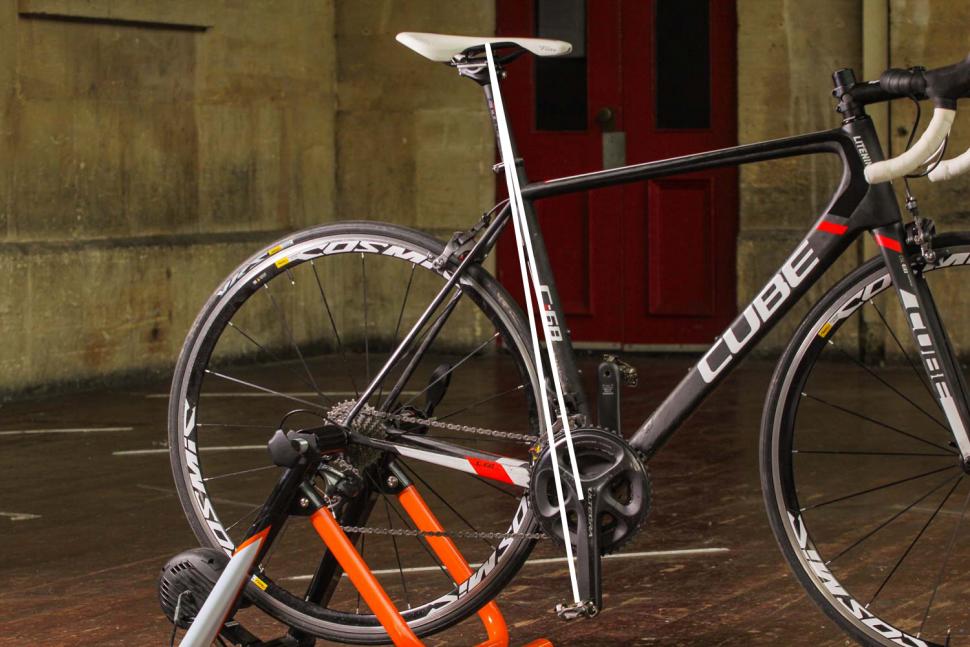
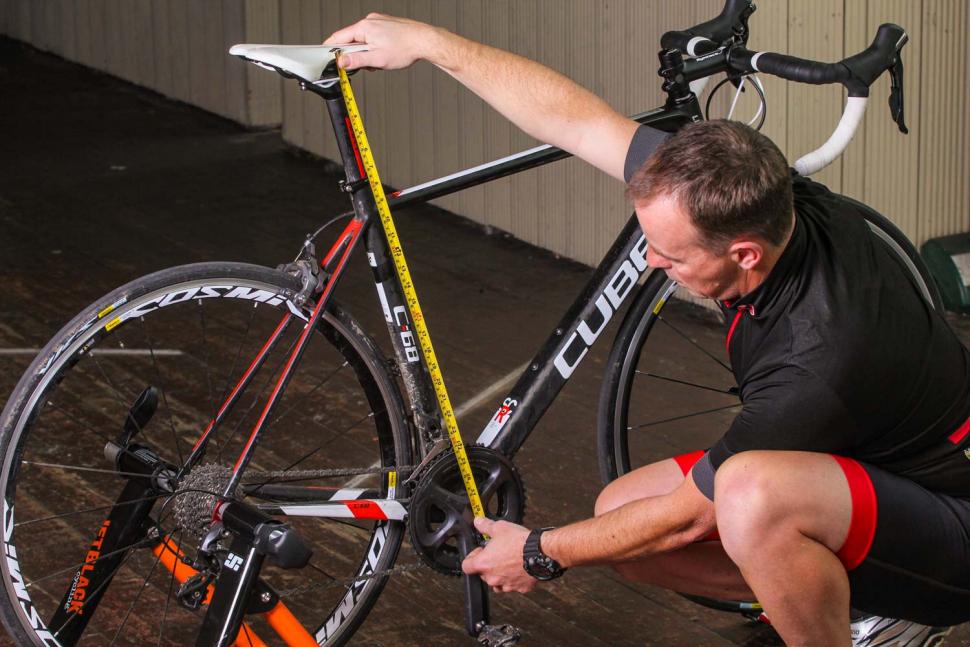
2. Finding the truth. There are many old wives tales, arcane theories and mathematical formulae to give a to-the-millimetre answer to your personal saddle height measurement; from the classic 109% of inside leg length from saddle top to pedal - with crank set to six o'clock, to the newer 88.3% of inside leg length for centre of the bottom bracket - to top of saddle, as favoured and practised by three time Tour De France winner Greg Lemond. Whether you measure centre to top or pedal to top, why does it have to be so exact? With research showing that as little as five millimetres discrepancy has a major effect on power, and a potential source of injury and discomfort, so, getting the precise measurement dialled in is really important.
3. The numbers game. I’ve always measured my personal saddle height from centre of the bottom bracket axle, to the saddle top. Using this metric, I eventually settled on 72cm dead - as the saddle height which gave me best power and maximum comfort (when riding 175mm crank arms as I always do - I'm a mountain biker at heart). My inside leg measurement is 81.5cm. So, out of curiosity, I checked this matrix using the Greg Lemond 88.3% formulae, and by that calculation my ideal saddle height would be 71.9cm. So, my 'by feel' measurement was correct to within a millimetre. Cue mild smug face. Use whichever calculation method works for you, but don't stop tweaking the measurement if the result doesn't feel optimal when you're riding.
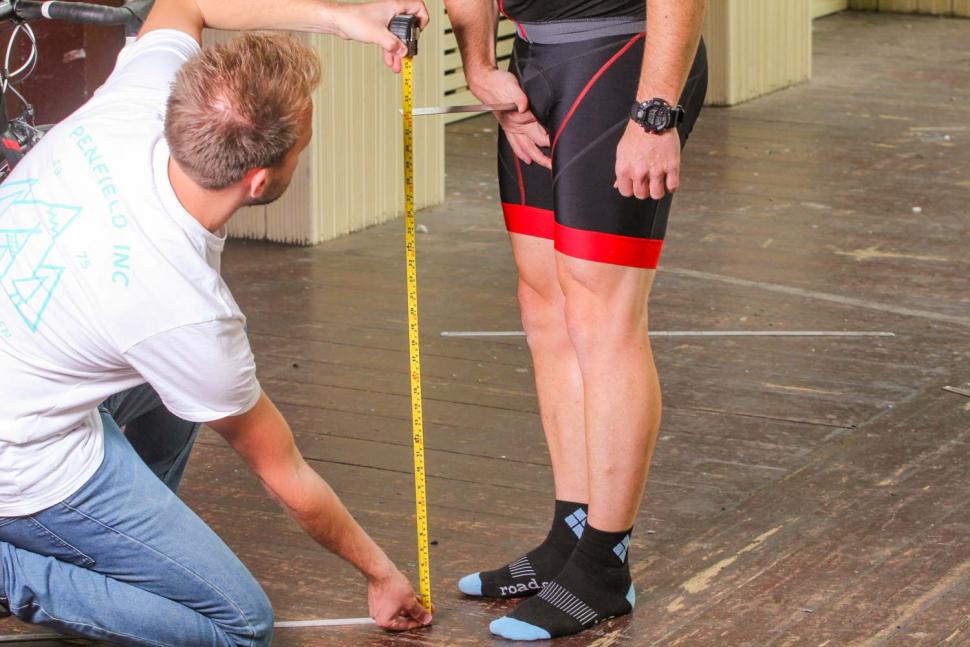
4. A friend indeed. It sounds daft, but when making the the calculation based on inside leg measurement, don't assume your chosen trouser length will do, trousers fit differently and the quoted measurements are never exact. Never try to take your inside leg measurement yourself, it'll always be wrong. Have a friend do it for you. Make sure you're in bare or socked feet, as we're looking for a high degree of accuracy to get you as near perfectly positioned as possible. Remember we're talking single millimetres making a difference.
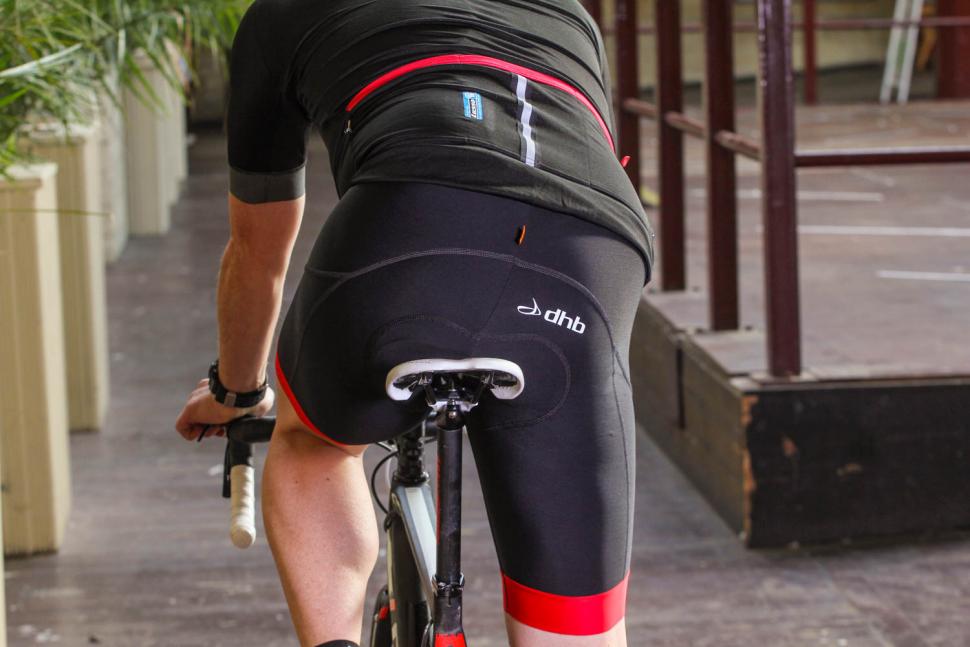
5. Getting hip, without the hop. Away from the numbers, correct saddle height has outwardly visible signs. As well as maintaining low muscle stress, through the stroke cycle, you're also looking to maintain stable, horizontal hips when spinning in a seated position. Viewed from the rear, when pedalling seated, your hips shouldn't be rising or falling, at their outsde edges, by more than 2cm. This isn't a finite target for setting saddle height, but a reasonable guide for knowing when it isn't quite right. Wildly rocking hips, as over extended legs reach for the pedal in the bottom of the stroke, or hips disturbed by cramped, under extended hip joints both mean you should make saddle height adjustments. There will always be some hip movement, it's the nature of sitting on a fulcrum, but it should be minimal - a soft movement, and not be overly engaging or stressing your lower back, sides or frontal core. naturally seeing yourself from the rear is tough, so get a friend to check next time you ride.
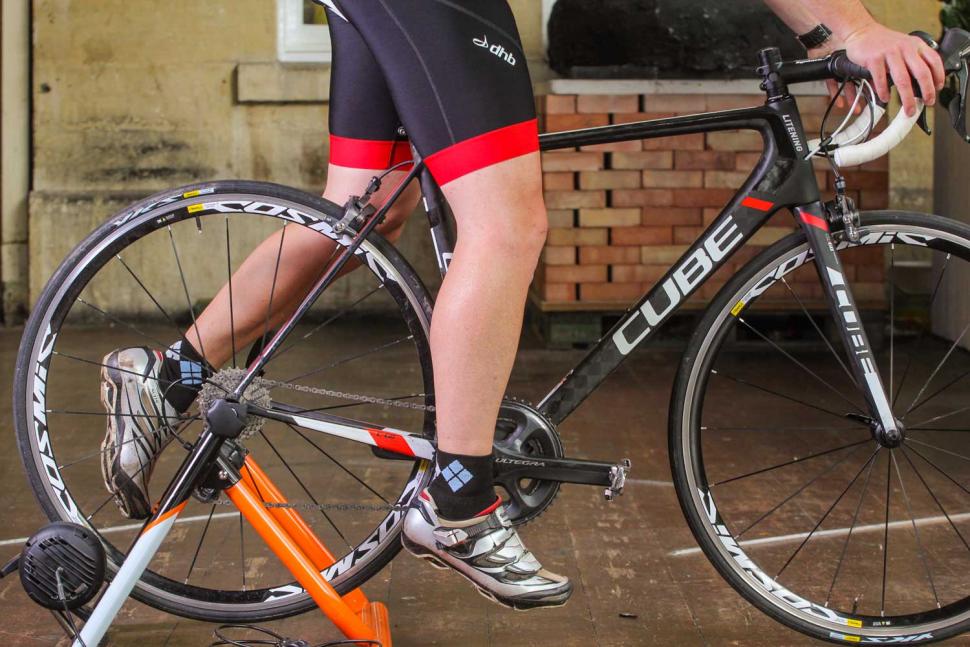
6. Ankling. A sign that your saddle height is too great, is when you're having to reach for the pedal with the ball of your foot (the cleat area) through the low part of the pedal stroke, it looks from outside like you're slightly pointing your toes through the low part of the pedal stroke. This causes the leg to over extend and shift the hips downwards to wards the pedal. Likewise, a saddle that's too low, will cause the angle between your foot and shin to close to at, or near, its maximum. As a rule of thumb, for comfort and efficiency, feet should be, more or less, at ninety degrees with the shin through the entire stroke.
7. Naturally cocked. The general consensus on the level of leg extension, is that when your foot is on the pedal and the crank arm is in the six o'clock position the leg should be what is referred to as 'naturally cocked'. To feel what that looks and feels like, sit on the saddle and let your leg hang under its own weight. It will not naturally hang fully locked out (to its maximum length), but instead hold itself in a slightly cocked position. This is the ball park angle you should find the leg in, when the foot is on the pedal, with the crank arm in the six o'clock position.
8. Going slowly. Seatpost adjustments, either up or down, should be made one at a time and in single millimetres. It can be a slow process, riding the bike between each adjustment, noting the differences in power output either actual via a power meter, or by feel. Don't be blinded by the power meter however, bikes are mostly for riding for smiles, not winning races. Do not disregard your comfort as a vital factor. The fact is, if you're not comfortable seated and pedalling, regardless of what the science says, then you probably aren't going to improve your cycling experience.
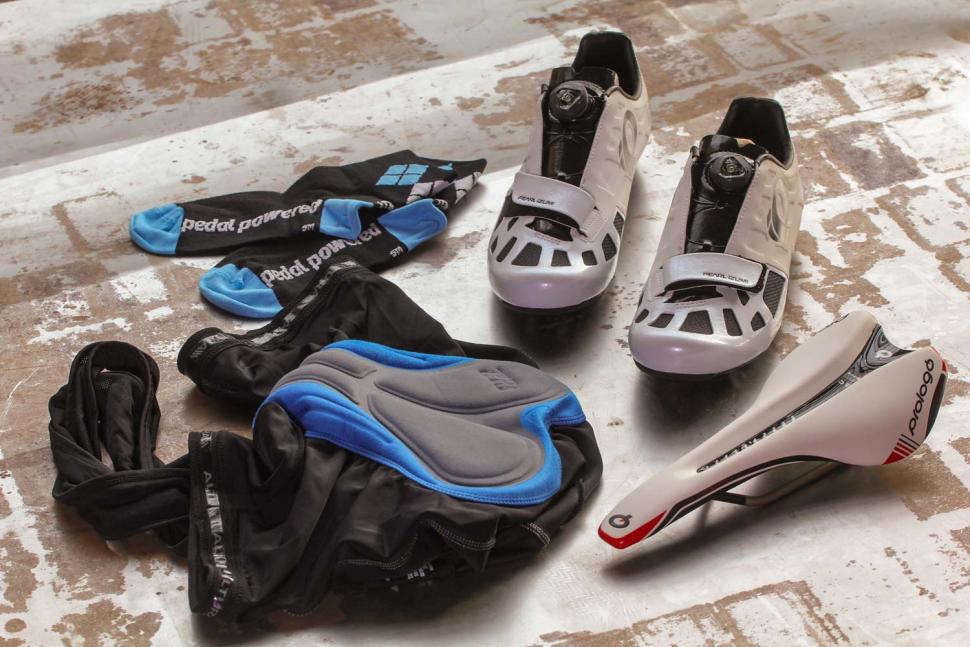
9. Little things, big differences. Remember that the final measurement can be affected by many things; your health, the weather - temperature makes a difference in how flexible your muscles are, your clothing, your flexibility, the specifics of your saddle - curved shell models can have 1.5cm difference in height between nose/tail and middle, your stem reach and bar height, pedal height, shoe sole depth, even the thickness of the socks you choose to ride in. As you boil your personal measurement down to the final millimetre - and then get a bunch of miles ridden at that height - you'll come to sense any new differences in your saddle height as instinctively as changes in your health.
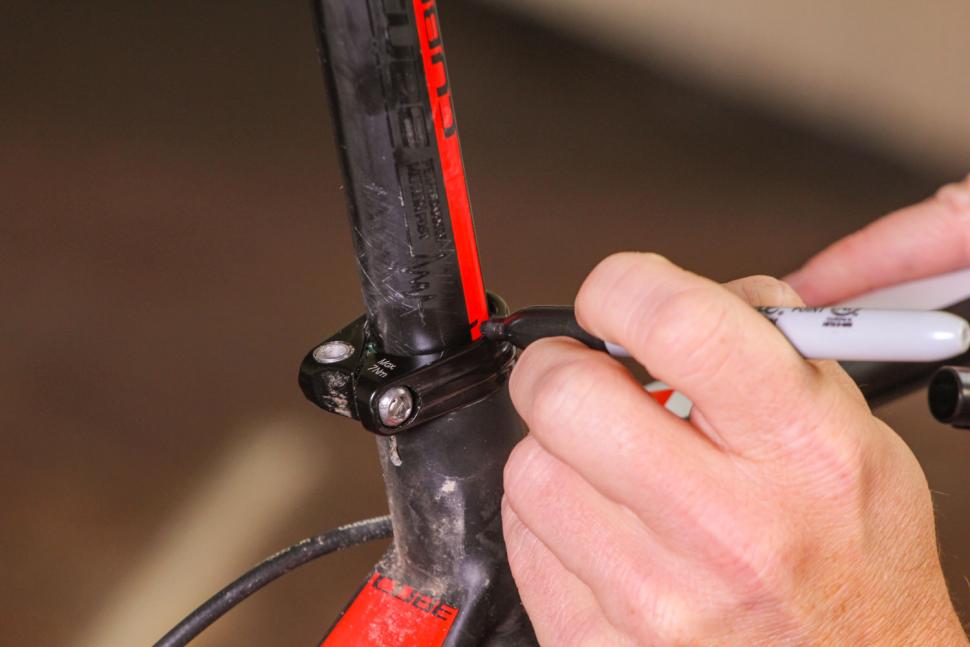
10. Make notes not notches. Making your mark. There's no point in knowing what measurement you need, then not using it. Write it down and commit it to memory. Even the pros know sooner or later their seat post will get removed or adjusted and the measurement will be (temporarily) lost. Some like to mark the correct height on the seatpost with a small wrap of electrical tape, or if you're detail obsessed, a small mark, or dot on the seat post with a permanent marker pen or a white china graph pencil. Fizik make a neat rubber memory marker for their seat posts. Don't be tempted to make a scratch, or scribe, a mark in the seat post, as an aide memoir, for that way disaster lies.
Bonus tip: Be kind and pass it on. Once you've got your own saddle height measurement perfected, don't be afraid to help other riders achieve theirs. I see a lot of riders under, or over extended, legs cramped or straining, hips rocking, not achieving good power, efficiency or in many cases, basic cycling comfort. Most have set their saddle heights by guesswork or blind ignorance that it makes such a difference, so some friendly, constructive advice from you might be helpful.
Latest Comments
- Cugel 14 min 43 sec ago
Have ye forgot yur duty as a mindless consumer!? Not to mention yur task as click-fodder to the marketing effort of RoadCC!!! ...
- Rendel Harris 25 min 33 sec ago
Actually apparently registrations of supercars fell by 67% in the UK last year so...
- Disgusted of Tunbridge Wells 13 hours 50 min ago
"One cyclist said while trying to avoid this puddle he was nearly knocked off his bike."...
- mattw 16 hours 48 min ago
Lisa Townsend very much views her police role through a political lens....
- Bigtwin 17 hours 44 min ago
Museum thread, but hey. I had one of these, before I saw this review. And it's spot on. The review, not the bike. I put up with it for a couple...
- mattw 18 hours 21 min ago
Signed and promoted in a couple of my networks.
- wtjs 20 hours 48 min ago
Good point! Over 18 months later, and I haven't seen (could have missed it!) a long term review of this groupset
- unami 21 hours 2 min ago
https://www.autoexpress.co.uk/exclusive/365458/driver-whose-towbar-voide......
- Miller 23 hours 42 min ago
Pogi and a few of the others are on the divisive new Colnago aero bike in those Insta photos.



Add new comment
47 comments
.
I once used the GCN do you own bike fit to try and find those extra watts.
I did myself a mischief and could barely ride for 2 weeks.
I found I like the saddle tilted forward slightly.
All good methods. But dont forget to check the fore n aft position as well as tilt. all three effect how the power is applied and adjusting hight only without checking the other two can significantly change power application (and COMFORT!)
I broke my femur at the beginning of the year and now my right leg is 1cm shorter than the left so getting an inside leg measurement so as to calculate the best pedal to saddle distance is a bit diffcult! Maybe different crank lengths?
When I went for my first bike fit, the saddle felt too low for me, so I put it up nearly 2 inches.
My second bike fit, a few years ago, which I went for to sort out the geometry of my new road bike frame, said I'd been riding with the saddle 3cm too high, but putting it down that much felt too strange, so I compromised on half way between the two. Never had any problems with my hips or knees, apart from a bit of cramp in my legs on very long rides if I've been pushing too hard.
Interestingly, I've had a chiropracter tell me my hips were out of line, but then a sports physio told me my left leg is about 1cm longer than my right. I've had to have some of my trousers adjusted to shorten the right hem.
To clarify, you've had 2 bike fits, both of which recommended a lower saddle position than you have. My thought would be that your saddle is probably too high!
What you are used to may feel right, but that does not mean that it is right.
A lower saddle position will enable you to produce more power, so I'd suggest giving it a go.
That said, 15mm above recommendation, you are probably still within an optimal range so nothing to see here.
Personally I've never (3 times in 30 years) regretted the money I spent on a really good bike fit. However I also put a lot of store in the studies that show that bike seat height +/- 12mm (so an inch total variation) makes no difference to your power output. You actually vary the virtual seat height by about 10 mm while shifting about on the saddle, from sitting back to 'on the rivet'. Primarily it's a comfort thing. Use one of the arbitrary formulas to give you a ball park starting point and then find what is comfortable.
The good thing about a good bike fit is it looks at the whole lot, not just seat height. For me I gained some sustainable power (measurable on a power meter) and got rid of some nasty butt pain by having my cleats moved back about 10 mm from the traditional under the ball of the foot position. Apparently it engaged my glutes better.
Adjust saddle..
Ride out for a couple of hours whilst remembering to take your Allen keys with you.
Adjustments to be made at stops for coffee/cake.
Works a treat every time.
Re: ankling.
If you use your ankles correctly, you can utilise the full potential of your calf muscles, if you don't move your ankles at all, you're only using your thighs. Ankling correctly eliminates the 'dead' spot in the pedal rotation.
BTW. 109% of leg length with pedals at 6 o'clock doesn't account for variable seat tube geometry. 111% of leg length with cranks in line with seat tube is probably better.
I was getting knee pain no matter how I adjusted my cleats so focused more on the saddle height. I used a goniometer in the end and set a knee angle of 25 degrees as recommended to determine the saddle height. Knee pain disappeared and it also feels right.
I think whatever method you use, changes will always feel wrong at first because we adapt to the way we ride and become used to it. However a week or two of riding and the changes become the new norm. There's way too many variables in play for all of us to get seat height spot on and I would wager most of us have got it wrong by a few mm. Providing you are within your range and it feels okay stop worrying about and just go ride.
Why when measuring are people not even measuring from the top of the footbed in the shoe to the top of the saddle?
Bottom bracket or even pedal to seat height are not reliable because the thickness of the soles of the shoes, the exact model of pedal used and the specific plates used can all make several millimetres difference.
I always used to use the heel on the pedal method and being able to reach that without rocking the hips to get a base - which actually uses the longest distance from saddle top to pedal ( which may or may not be in line with the seat tube depending on the amount of saddle layback which had been set with a plug-line from back or kneecap to BB centre. Then adjust that based on the distance from the footbed of the shoe over the pedal axle to the centre of the pedal spindle. There was also a small adjustment on my track bike due to the slightly shorter cranks. Any change in footwear pedal or saddle would of course require changes and adjustments.
Sounds complicated but it meant getting a good leg position across all bikes with the appropriate footwear and pedals. All the other adjustments to position such as stem length, height, width of bar, position of brake levers are then adjustable for the purpose of that particular setup - so my track and road racing bikes would have pretty similar positions, my touring bike would have a more relaxed body position with a slightly shorter reach and slightly higher stem and my cyclo-cross bike would have the same reach as my race bike but with a slightly higher stem. But in all cases leg position would be the same.
That worked well though many seasons of racing, training and sometimes touring - averaging between 10,000 and 15,000 miles per year and the only knee pain I ever had resulted from bent pedal spindles (that occurred twice with a specific model of Shimano pedal which bent without and knocks or grounding within a couple of weeks so I stopped using those).
I can't dispute the merits of Lemond's method, after all he won the TdF a few times, and I haven't/won't.
Curious though, why not measure to top of pedal platform as a consistent baseline from which to measure? That factors in crank length and also cleat stack height. Back in Greg's era, the original Look pedals had about a 10cm stack on them , versus today's more contemporary pedals. In fact my new Look pedals are even 3mm lower stack height than the previous generation
Because it's not 'guess work', it's about following a basic set of rules then adjusting your position to get it right. You also get to learn about yourself and the bike fit process.
Honestly, some people need to pay to be shown how to wipe their own bums.
How will you manage when you buy a different style of bike? Fit is different on a cross bike or a mountain bike; out comes the credit card again?
There's a lot more to optimal positioning than most people can fathom.
Don't get me started on those crappy Retul/BG Fit style systems that try to fit everybody into predefined parameters, because everybody is the same don't you know.
That's not what Retül is about or should be used as - as with all fits most of the work is done by the fitter and their experience and expertise is paramount. Dynamic capture is a tool, to be used as part of the whole fitting operation, that's all.
If your spending over £1500 on a bike, why would you not invest £150 on a professional bike fit and remove all the guess work!
(Paraphrasing) 'as I'm a mountain biker, I use 175mm cranks...'
This is just stupid.
Leg length / 5 is only approximate, but it's better than the advice in this article.
It's such a complex area as it depends on lots of individual elements (leg length, feet length, angle of your feet on the pedal stroke, seat position, pad thickness etc). Have a look at the Bike Fast Fit app as reviewed by DC Rainmaker, I used this to solve positioning issues on my commuting bike and it made a huge difference. You'll find a lot of professional bike fitters use it as a tool.
http://www.dcrainmaker.com/2013/10/automated-measurement-review.html
I presume you light your cigars with a £10 note too!
For those of us without money to burn, it makes far more sense to learn about bike fitting and pay attention to your own fit; it's not hard to do.
A tenner? Ha! Plebs.
It may not be hard to fit yourself into a comfortable position that you believe is working for you, but that does not mean it is your optimum position. I could previously quite happily ride for several hours pain-free, but after a recent bike fit had my saddle raised by nearly 2 cms and moved forward by the same amount. I am now more aerodynamic and more efficient in power transfer, but still comfortable.
This article only focuses on saddle height, but the setback is just as crucial.
After attempting self 'bike fit' I wasn't convinced I was doing it right.
I suffered a number of hip/knee issues during and after cycling (sore knee) for a few years. So instead off packing cycling all together I made the effort to get a proper bike fit which resolved these. I'm now pain free. My saddle hight was far to low, the seat pushed far to forward limiting movement in my hip & glutes.
Meh, I paid £110 for a bike fit about 2 1/2 years ago. If I think about how many hours I've cycled since then in considerably greater comfort than before, the cost is fairly trivial in the grand scheme of things. It's some of the best money I've spent on cycling, to be honest.
Buy your bike from proper LBC, and bike fitting is part of the deal, along with trial saddles if necessary. And contrary to common belief, an LBC is not necessarily any/much more expensive by the time you've done a bit of negotiating. Fitting is more than just setting saddle height.
Go see a Pro Bike fitter (if you've never been) then every few years go back and get your measurements checked. There's more to it than just saddle hight how about crank length, stem length & positioning of the saddle? Cleat positioning on the pedal stroke? Frame size!
If your suffering for aches and pains while cycling a visit to a Bike Fitter (I went to see Adrian Timmis) is the best option and sorted me out, money well spent.
I started out by following the old advice of getting the saddle as high as possible and ended up pointing my ankles right down. Not much power but no knee pain.
So fitted myself using the heel on pedal with straight leg, which when checked against the LeMond method was perfectly aligned with both. That's given me the most power.
I can now pedal better in circles, where you can gain a little extra power like the pros from ankling a bit, dropping your heel at the bottom to get a slingshot effect.
Only problem is, I definitely feel more pressure on the knees since I dropped the saddle to this point. I think you have to go slightly too high sometimes to eliminate knee pain, because all of our bikes have cranks that are too large. The knee ends up having to bend too much and then put pressure on at too acute an angle on the downstroke. With smaller cranks this wouldn't be an issue.
to throw into the mix, I changed from an SLR XP to an SLR, so lost 2-3mm of padding on the saddle, my knees responded by hurting. adjusted the saddle height and all was fine. Changed from Sidi Genius 5's to Sidi Fives, and again my knees responded badly until I tweaked the saddle height
I guess it is simply a case of different people have different levels of tolerance to change.
I always went for 109% of inside leg. Then I heard about the Lemond method, calculated it and with 175 cranks was within a millimetre. Since then, the only change I've made was to lift the saddle 10mm after being told (by a custom frame builder) that I was sitting too low. It gave me brutal calf cramps. I dropped the saddle back and no problems.
Interesting information from Steve Hogg who is considered something of a maverick by some, and considered to be a leading authority, who challenges old dogmatic thinking, by others:
https://www.stevehoggbikefitting.com/bikefit/2011/02/seat-height-how-har...
One thing people have forgotten to mention is the padding in shorts. Some pads are thicker than others, so along with different sock and shoes you could have a great deal of difference.
Pages