

- News
- Reviews
- Bikes
- Components
- Bar tape & grips
- Bottom brackets
- Brake & gear cables
- Brake & STI levers
- Brake pads & spares
- Brakes
- Cassettes & freewheels
- Chains
- Chainsets & chainrings
- Derailleurs - front
- Derailleurs - rear
- Forks
- Gear levers & shifters
- Groupsets
- Handlebars & extensions
- Headsets
- Hubs
- Inner tubes
- Pedals
- Quick releases & skewers
- Saddles
- Seatposts
- Stems
- Wheels
- Tyres
- Tubeless valves
- Accessories
- Accessories - misc
- Computer mounts
- Bags
- Bar ends
- Bike bags & cases
- Bottle cages
- Bottles
- Cameras
- Car racks
- Child seats
- Computers
- Glasses
- GPS units
- Helmets
- Lights - front
- Lights - rear
- Lights - sets
- Locks
- Mirrors
- Mudguards
- Racks
- Pumps & CO2 inflators
- Puncture kits
- Reflectives
- Smart watches
- Stands and racks
- Trailers
- Clothing
- Health, fitness and nutrition
- Tools and workshop
- Miscellaneous
- Buyers Guides
- Features
- Forum
- Recommends
- Podcast
 How to fit tubeless tyres Feb 2025
How to fit tubeless tyres — everything you need to know in this step-by-step guide
Setting up a tubeless tyre isn’t as simple as fitting an inner tube, and it can get a bit messy - but it’s well worth the effort. Whether it’s your first attempt or you’re looking to refine your technique, here’s how to make the process as smooth and straightforward as possible.


Tubeless is arguably the biggest advance in bike tyre technology this century. As the name suggests, tubeless wheel and tyre combinations have allowed cyclists to eliminate the need for inner tubes. Some cyclists say this offers improved road feel, and when used in conjunction with tyre sealant, fewer punctures.
As advantageous as tubeless is, we have to level with you and concede that the system isn't as clean or easy to set up as using inner tubes; but the long-term benefits to the quality of your riding could be well worth the added investment in time and money. Once you get the hang of it, setting up and maintaining tubeless becomes routine.
What tools and materials do you need to set up tubeless tyres?
> A beginner's guide to building your first bike tool set
- Tubeless ready wheels and tyres
- Tubeless valves
- Tyre sealant
- Tubeless rim tape (unless your wheels have a solid rim bed)
- Track pump or air compressor
- Tyre levers (optional)
- Rag or towel
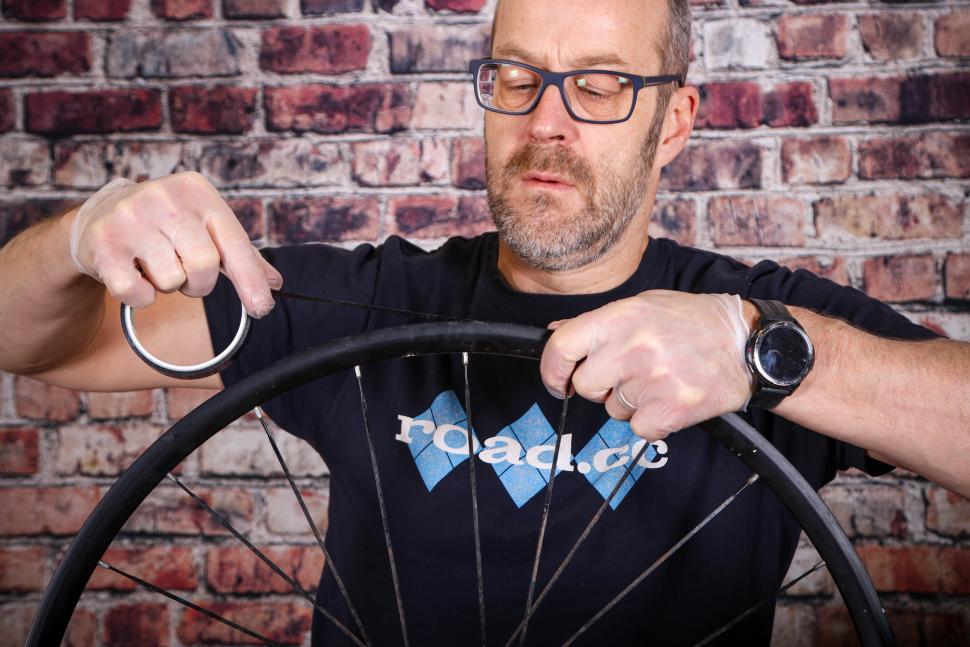
Step 1: Preparing your wheels
Before going anywhere near any sealant you need to ensure that your rims are both tubeless compatible and up to the job of holding air. Often this will involve using tubeless specific rim tape to seal the valve holes, unless you're lucky enough to have wheels that have a solid rim bed construction. These are becoming more common, and an increasing number of brands ship wheels with tubeless tape already fitted too.
Give the rim bed a thorough clean with alcohol or label remover and allow it to dry completely.
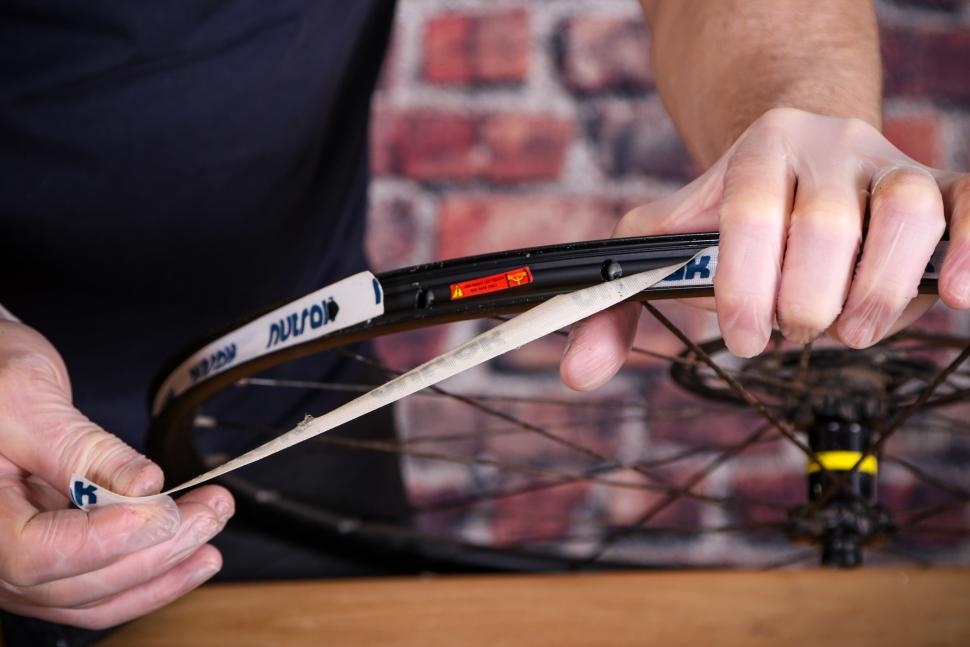
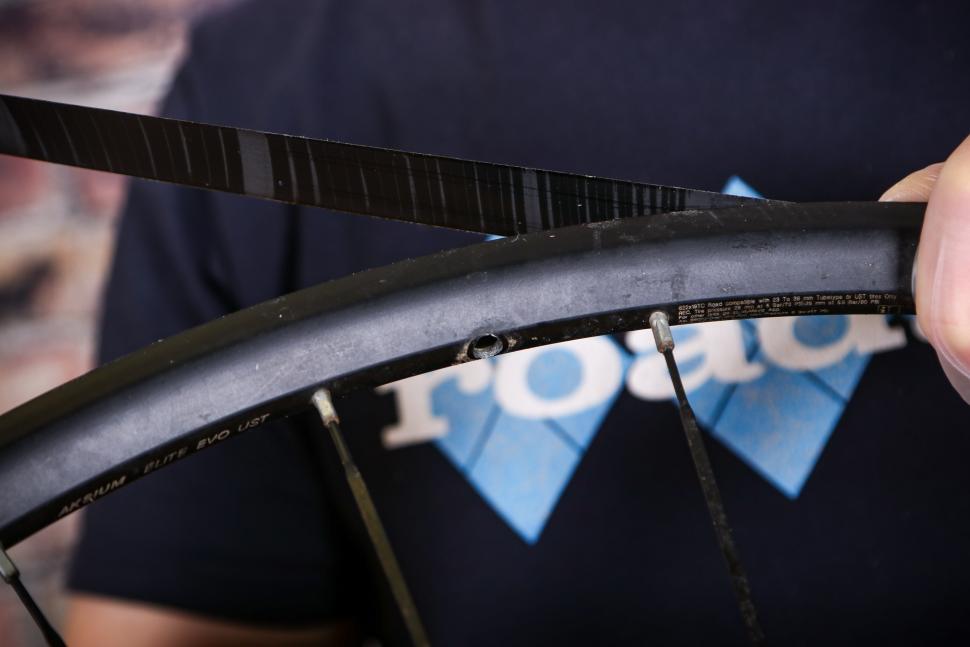
Step 2: Applying tubeless rim tape
In order for a tubeless tyre to work, the rim must be made air tight. Your wheels may already have tubeless tape fitted, but if not, you will need to apply an adhesive tubeless tape to the rim bed.
Line the tape up in the rim bed to one side of the valve hole, and covering the valve hole work around the rim applying the tape evening into the centre of the rim bed. Keep good tension on the tape as you go, as you're looking for a nice sung fit, with no ripples, folds or creases.
Make sure the tape is perfectly centred as it is laid down inside the rim well. This will help ensure an air tight seal of the rim bed and help the tyre bead 'find' the inner sidewall of the rim faster as you inflate. This is especially important if you're using a regular track or hand pump.
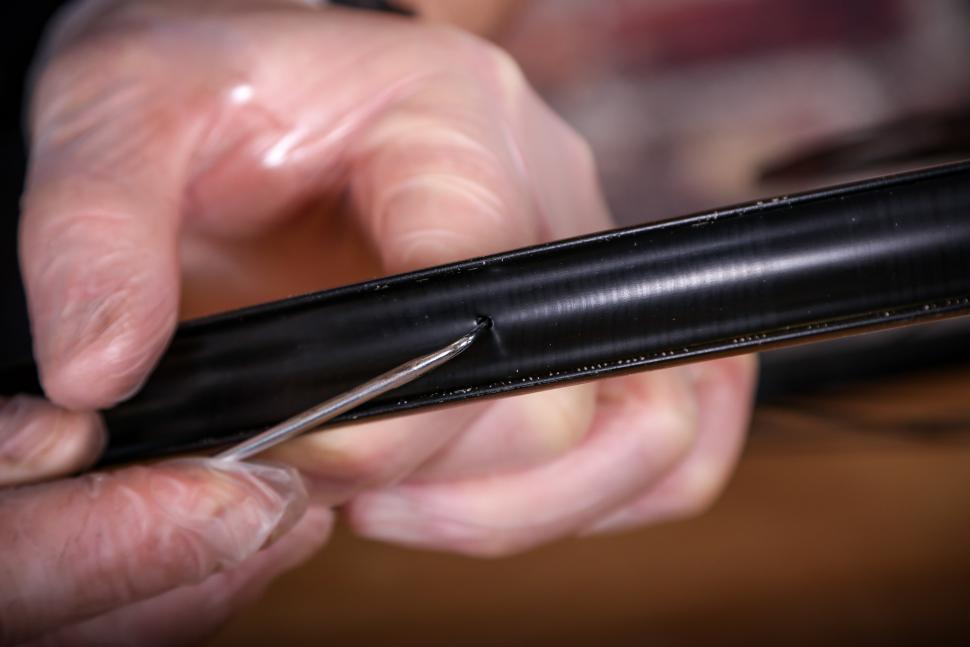
As you bring the tape around to the valve hole, where you began, make a neat trim to butt the two ends of the tape up to each other. Use a sharp point to pierce a small, neat hole through the tubeless tape through the valve hole - from inside the rim bed in the same direction as the valve will be fitted, otherwise you will lift the tape off the rim bed and risk ruining the air tight seal.
When the tape is installed, go around the rim checking it's fully seated with no ripples, tucks, folds or creases where air can leak. Take a few minutes to get this right. Use your fingers or the rounded end of a small screwdriver handle to push the tape right down hard. If, after attempting to pressurise the tyre, the fit between the tyre and rim is too loose, you might want to add another wrap (or two) of tape to build up the rim bed depth and create a tighter and more effective seal between the two items.
As we've mentioned already, disregard this step if your wheels already come fitted with tape or the rims are tubeless-ready. You can just skip straight to step 3...
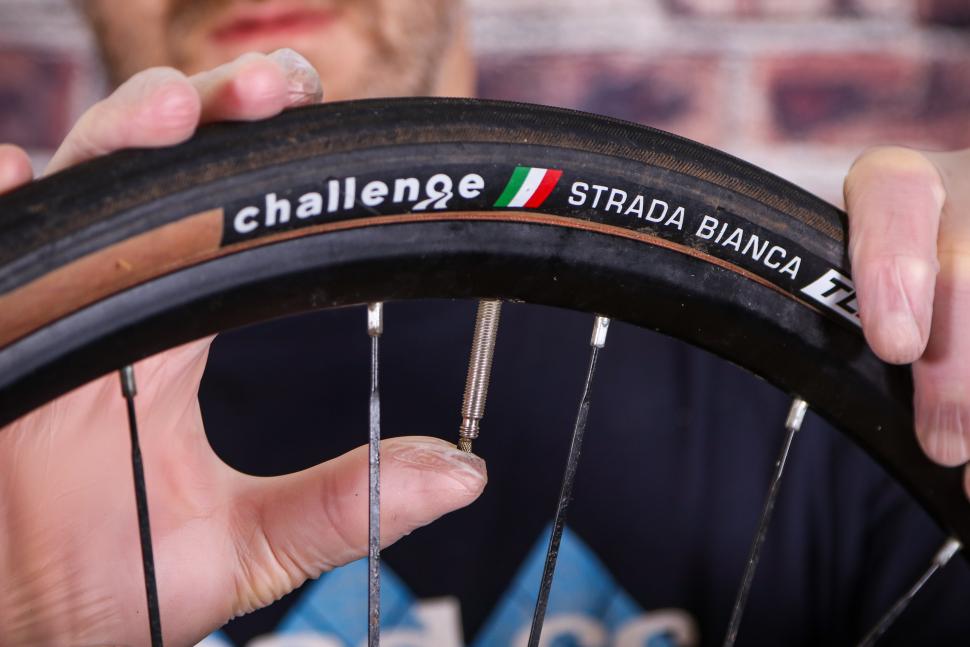
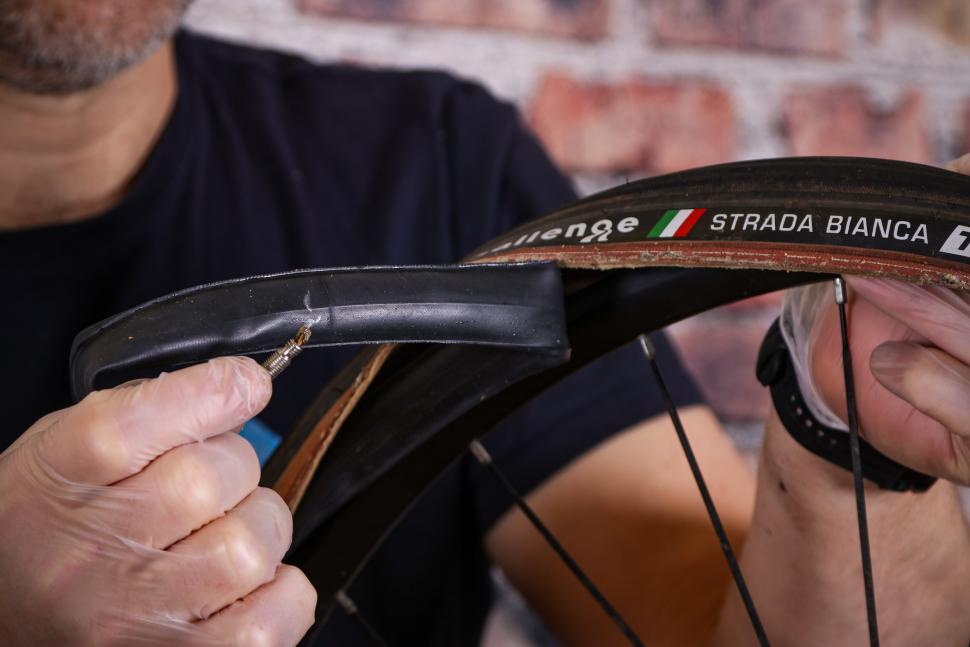
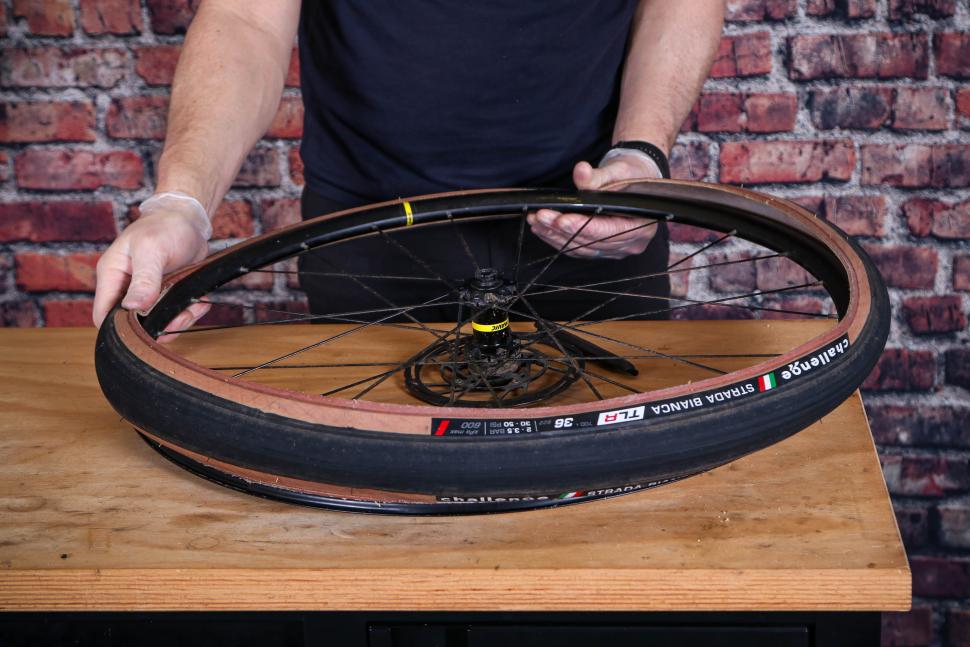
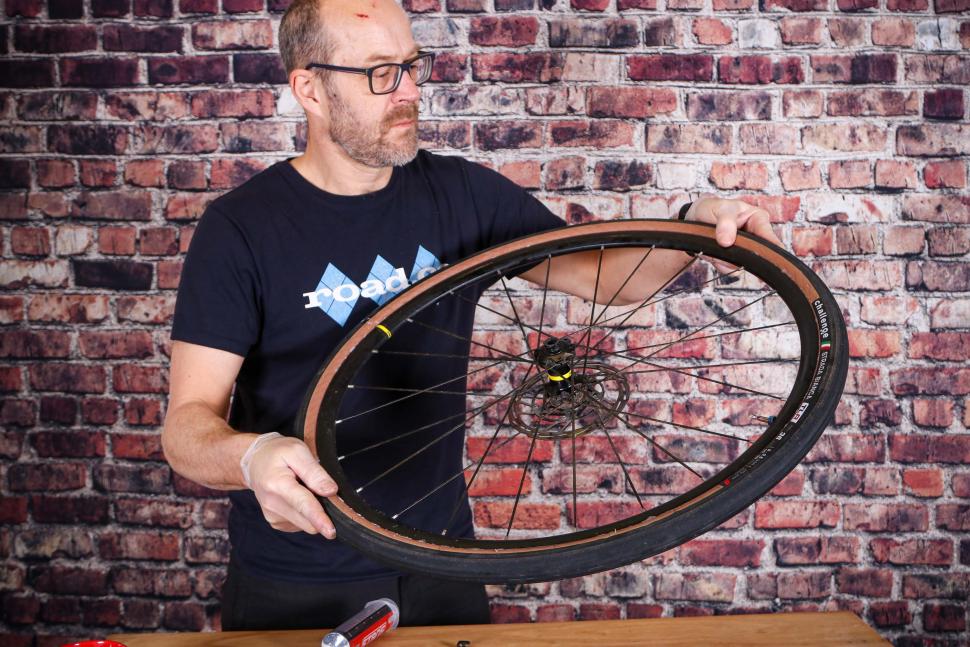
Step 3: Seat a bead
The next step is to fit the tyre and get the bead to snap into place. Pre-inflate the tyre without sealant to seat the beads without spraying sealant everywhere. This means you halve the job air pressure alone will have to do. Once the tyre is seated, let it back down.
Tubeless tyres can sometimes be stiffer making them harder to put on, but this is something that has improved over time. With a really tight rim/bead combo you may struggle to get the final bead over without tyre levers so you can use these to put the tyre back on as you don't risk pinching an inner tube.
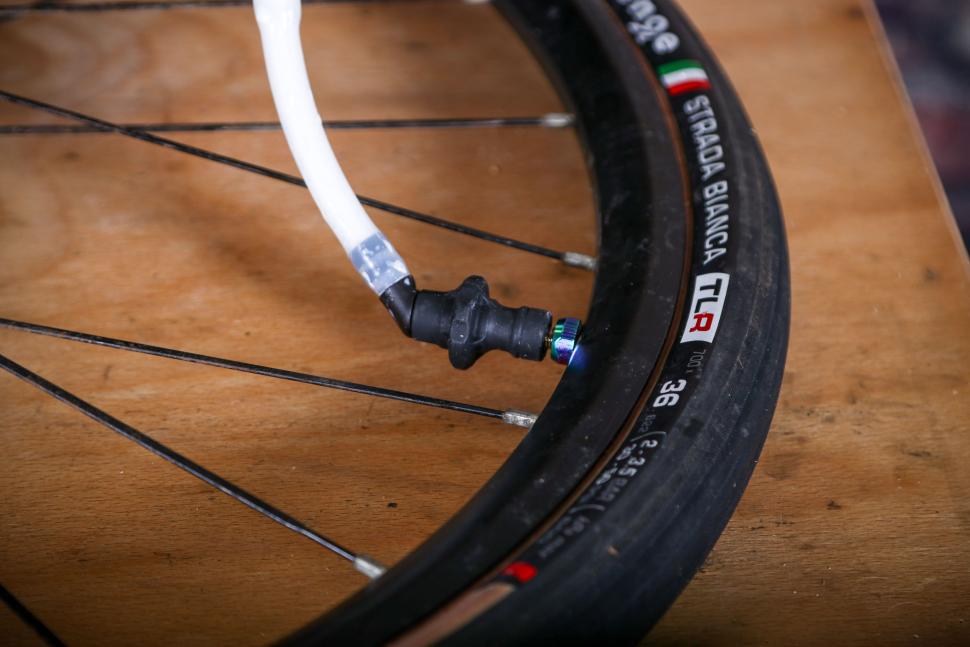
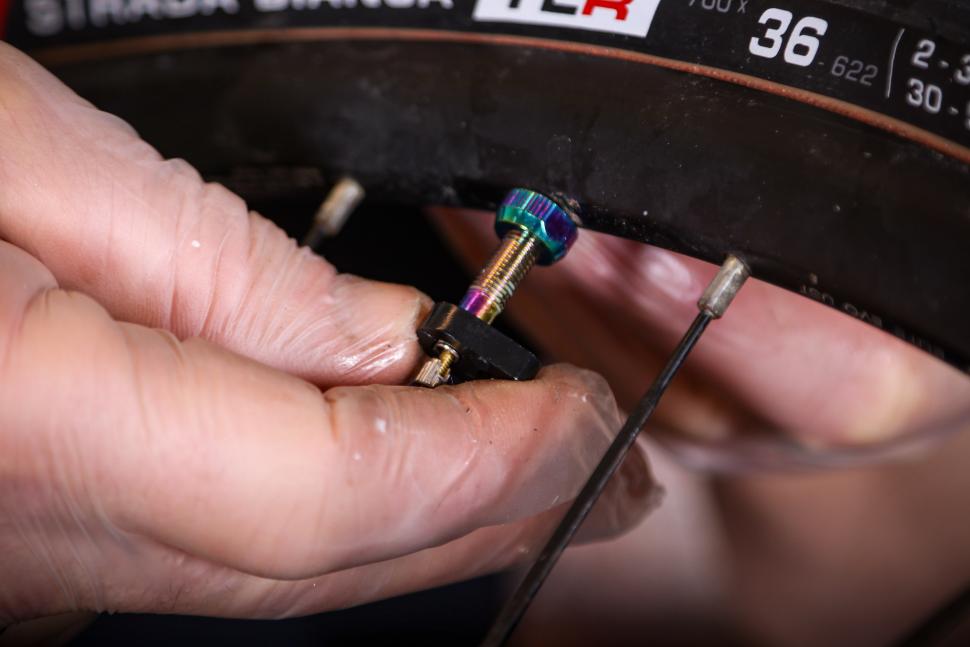
Step 4: Fit the tubeless valve
Ensure the valve's rubber foot is properly seated into the rim well. Often they're shaped and only fit to make an effective air tight seal one way. Add the necessary rubber O ring seals (if your valve uses them) and threaded lock rings and snug them down tight to make the valve assembly air tight. Remove the valve core.
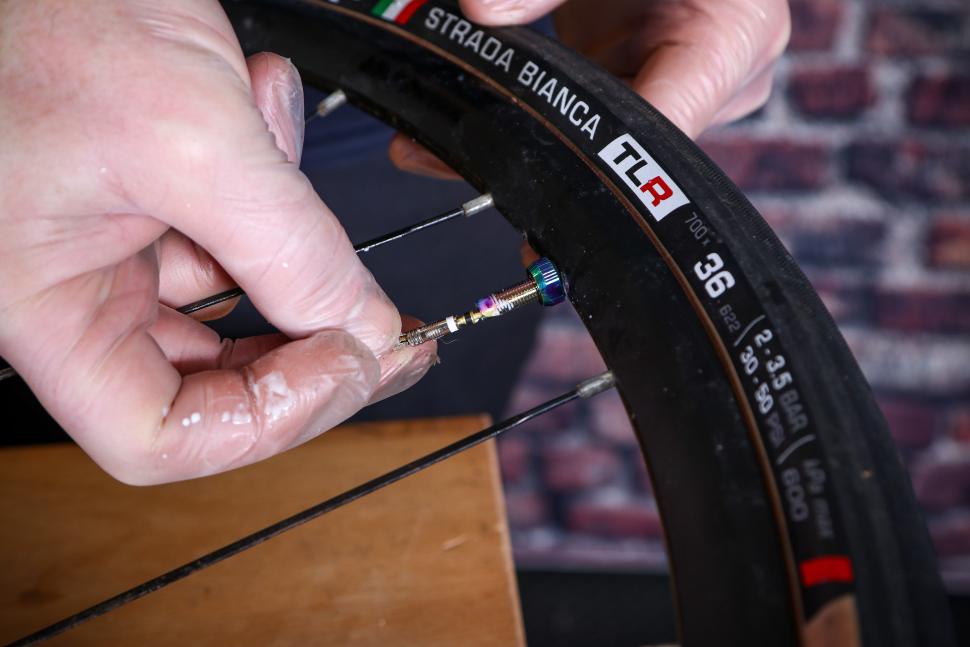
Step 5: Adding sealant
To prepare the sealant, draw it into a syringe fitted with a flexible rubber hose. This will fit over the valve stem and allow direct insertion into the tyre.
> What happens when a Tour de France rider punctures?
With the rubber hose fitted over the valve stem (the threaded outer will grip the inner surface and stop fluid leaking out) you can push the fluid into the tyre.
There will be some mess at this stage! Some sealant will seep out of the bead during the fluid insertion and tyre fitting inflation process, which is normal and necessary for the sealant to fill the gaps between the tyre and rim. Wipe it away as soon as you've made the seal and got the tyre to pressure. The sealant is sticky and can leave stains on your frame, tyres and rims. Refit the valve core.
It's worth mentioning that some innovative brands have been making efforts to make insertion more efficient and less messy in recent years, one being Reserve with its excellent Fillmore valves designed to prioritise high flow rate and prevent clogging; although these and valves like them are considerably more expensive than basic ones.
Step 6: Spread the sealant
You can help the sealing process by giving the tyre and wheel, once prepped with sealant, a good jiggle. This moves the sealant around the entirety of the inner surface of the tyre. You can repeat this process once the tyre is inflated as well to help with the final sealing.
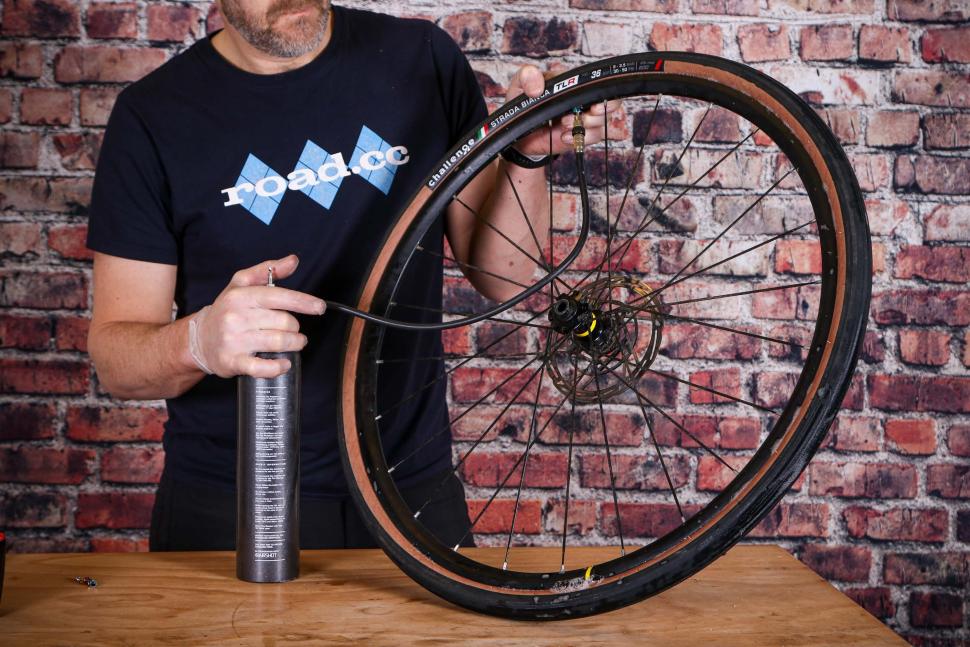
Step 7: Inflate the tyre
Most of the frustration of tubeless setups comes at this stage, so a good pump is key here. Ideally, you want to get a lot of air into the tyre as quickly as possible to blow the beads into the rim quicker than air is able to escape.
This is most easily achieved with a home compressor, or one of the newer breeds of tubeless-specific track pumps that can be pre-loaded with a high-pressure blast of air. A standard track pump will usually work (though it's slightly more effort), and if you've set up the system well and chosen your tubeless tyre and rim combination wisely, even a hand pump can make the magic happen.
How much air should you put in your tyres? For road tyres this is usually measured in psi (pounds per square inch), and most wheel manufacturers will provide a recommended psi for their wheels with various tyre sizes.
Tubeless tyres typically run best at lower pressures than standard clincher tyres with tubes, so expect to be pumping yours to well below 100 psi like the days of old on 23mm tyres. To give one example, using Giant's tyre pressure calculator for its hookless wheels, it recommends that a 75kg rider using 28mm tyres on a 22.4mm-wide rim should inflate to 61 psi (4.2 bar).
Step 8: Check the pressure

It's not uncommon for tubeless systems to lose a few psi after installation, as the sealant works to plug all the microscopic holes in the carcass and union between tyre and rim. Top up any deficit and ride; that also helps finalise the sealing process. Doing this whole process indoors, in the warm, also helps. You should find the tyre holds pressure consistently after 24 hours.
>> Read more: The full archive of road.cc maintenance articles
Do you have any tips or tricks for setting up tubeless tyres? Let us know in the comments section below.

Emily is our track and road racing specialist, having represented Great Britain at the World and European Track Championships. With a National Title up her sleeve, Emily has just completed her Master’s in Sports Psychology at Loughborough University where she raced for Elite Development Team, Loughborough Lightning.
Emily is our go-to for all things training and when not riding or racing bikes, you can find her online shopping or booking flights…the rest of the office is now considering painting their nails to see if that’s the secret to going fast…
Latest Comments
- Capt Sisko 3 min 43 sec ago
Every single photo is showing the front, now whilst that's important you as a rider have eyes, brakes and a brain so to a certain degree you can...
- E6toSE3 5 min 21 sec ago
Liked except... you and I (I'm age 70) are confident cyclists who can look backwards (I had a few years with a neck problem that discouraged me...
- David9694 53 min 59 sec ago
Calls for Oxfordshire transport chief to resign blocked...
- Mr Blackbird 1 hour 13 min ago
Depends how you ride them. The current trend among many pros is to ride in a track style looking down at the front wheel. Ok for racing on closed...
- Bungle_52 3 hours 18 min ago
That one was completely different though, it was a driver not a car as in the other 3. So 1 in 4 of the stories manage to follow reporting guidelines.
- Rendel Harris 5 hours 10 min ago
Absolutely they could have. Tarmac is a petroleum-based product and its surface can be very oily when it's newly laid. This is particularly the...
- ROOTminus1 11 hours 12 min ago
I'm glad the article went into more detail and cleared things up, the headline had me worried that some autonomous building had run rampant and...
- mark1a 11 hours 31 min ago
Still here, just showing a few signs of wear and tear. Hopefully still serviceable for some years to come.
- Rendel Harris 12 hours 16 min ago
How can you know that you are "equally fearful" as "any female cyclist"? There is no possible way of quantifying such emotions and female cyclists...
- chrisonabike 12 hours 48 min ago
I think it would be fairer to blame the moon - as in "my client is a loony".
Add new comment
12 comments
Thank you for a very informative article, but I'm afraid everything I read about tubeless makes it sound like an awful lot of arseache just to avoid fixing the occasional puncture. I mean, it takes me perhaps ten minutes to remove the wheel, pull the tyre, fit a new tube and put it all back together again. I think I've had to do this maybe once a year for the last five or six years of riding. Given that a lot of riders on tubeless setups still carry a spare tube, tyre levers and a pump "just in case", the advantages seem to dwindle to almost nothing. TPU tubes for the win.
More people have pinched a tube with a tyre lever than have had tubeless set up issues. Prove me wrong
#usererror
Or just do yourself a massive favour and ignore the relentless hype being shoved down our throats, throw it all in the bin and buy some TPU tubes.
If you're not so interested in chasing the latest fashions then you can make your life a LOT simpler by just using standard tyres and tubes. If you're not having problems with frequent punctures, then don't look for a messy and sometimes complex solution to a problem you don't have. I know a LOT of people who've tried tubeless on road bikes for a couple of years and reverted to tubes because the extra hassle just isn't worth it. Spend the time riding your bike instead.
I'm a pro' bike mechanic, so I know exactly how to do tubeless setups, but I wouldn't use it on my own bikes and I discourage my clients from using it on their road bikes unless they have a special situation.
What I like about road tubeless is that you can choose to do the "messy" bit at your leisure when you're topping up sealant or changing tyres etc. With an inner tube, you don't get to choose when to stop riding and have to take off the tyre to change the tube and in my experience it's often when it's raining. i.e. tubeless helps me to spend my riding time actually riding rather than fixing stuff.
In my experience road tubeless rarely holds air consistently. Losing a few psi per week is the norm with some much worse than that. I have one set of Hunts that consistently leak 10psi a day even though I've replaced both the tape, the valves and the tyres.
And when you decide to change the tyres for a summer option you then have the ridiculous job of cleaning all the sealant off the rim, good luck with that.
Never seen butting the rim tape before. I've always overlapped by a couple of cm.
I agree, I always overlap by several cms, mainly because the tape sticks to itself better than it sticks to the rim, so overlapping it means that the end is well stuck down.
Surely Step 4 has to come before Step 3? How do you inflate the tyre to seat the bead before you've fitted the valve?
Blow into it really hard?
I find it helps particularly with a brand new tyre that retains it's folded shape to seat it with an inner tube and leave for a while. You can then leave one bead seated when removing the tube and it's much easier to reseat the other afterwards.